Import Data From Word to Excel (Easiest Way in 2025)
In this article, we will show you how to import a Word document into Excel. Simply follow the steps below.
Importing From Word to Excel
Follow the process below to import Word data into Excel.
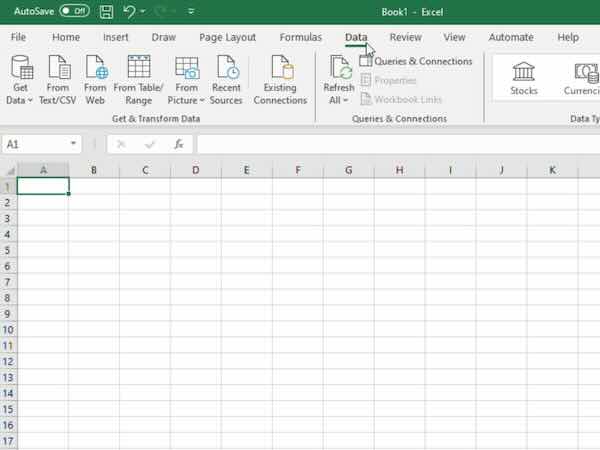
1. Click on the “Data” tab
In the Excel ribbon at the top of the window, locate and click on the “Data” tab.
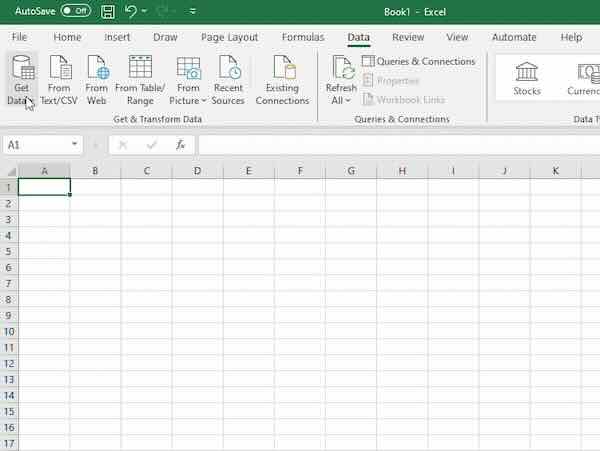
2. Select “Get Data” or “Get External Data”
Within the “Data” tab, look for an option labeled “Get Data” or “Get External Data.”
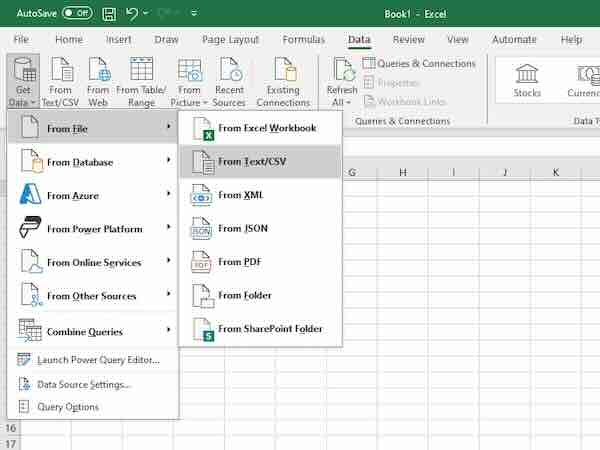
3. Choose “From File” and “From Text/CSV”
From the menu that appears after selecting “Get Data,” choose the option “From File” then “From Text/CSV.”
4. Navigate to and select the Word document
Navigate to the location on your computer where the Word document you want to import data from is saved. Click on the Word document to select it.
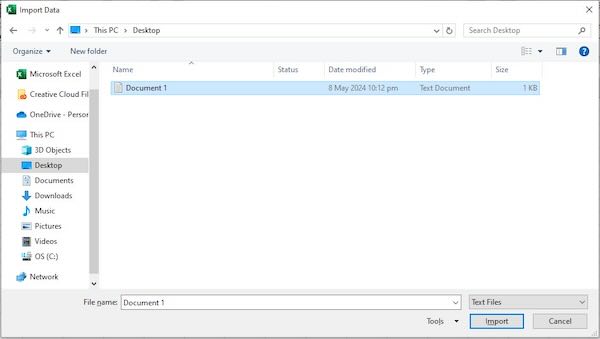
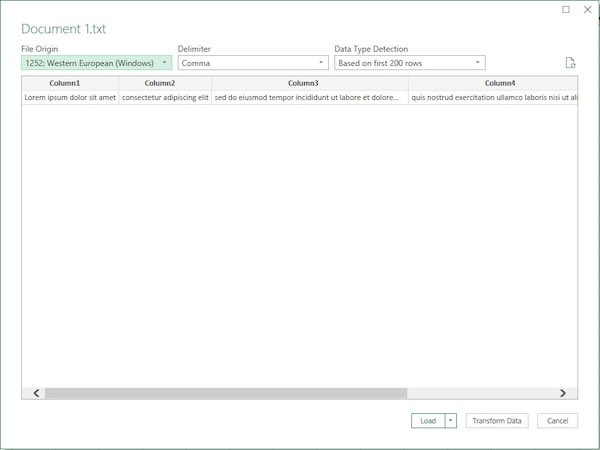
5. Import the data
Once you’ve selected the Word document, Excel will prompt you to specify how you want to import the data. Choose the appropriate options based on the layout and structure of the data in your Word document. Then, click “Load” to bring the data into Excel.
We hope you now have a better understanding of how to import data from Word to Excel. If you enjoyed this article, you might also like our article on how to import a picture to Excel or our article on how to import labels from Excel to Word.