How to Find Merged Cells in Excel (Easiest Way in 2025)
In this article, we will show you how to find merged cells in Excel. Simply follow the steps below.
How to Find a Merged Cell in Excel
Follow the process below to find merged cells in Excel using the Find & Select” feature.
1. Navigate to the “Home” Tab for Essential Functions
Locate and click on the “Home” tab positioned at the top-left corner of the Excel interface. This tab contains essential functions and options needed for navigating and editing your spreadsheet.

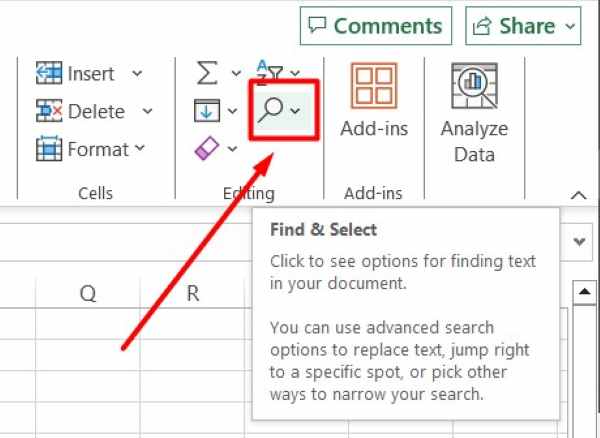
2. Locate and Access the “Find & Select” Button
Identify and click on the “Find & Select” button, usually situated on the right side of the ribbon menu. This button allows you to access various search and selection tools within Excel.
3. Access Specific Functions to Find Merged Cells
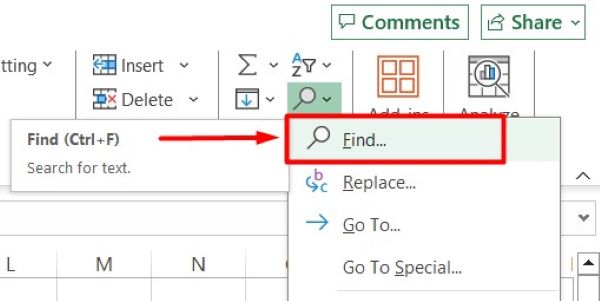
From the dropdown menu, choose the “Find” option to access a range of specialized functions. This option allows you to access advanced features for selecting specific types of cells.
4. Select “Merged Cells” Option for Targeted Search
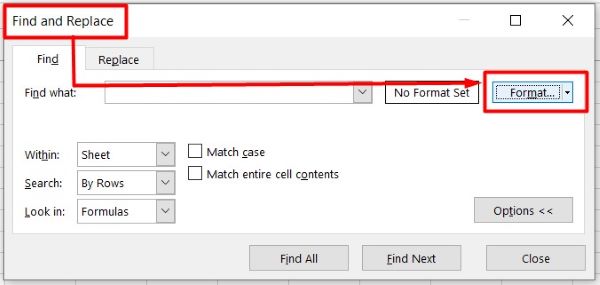
Within the “Find & Replace” dialog box, click the “Format” button. This will show you “Find Format” options.
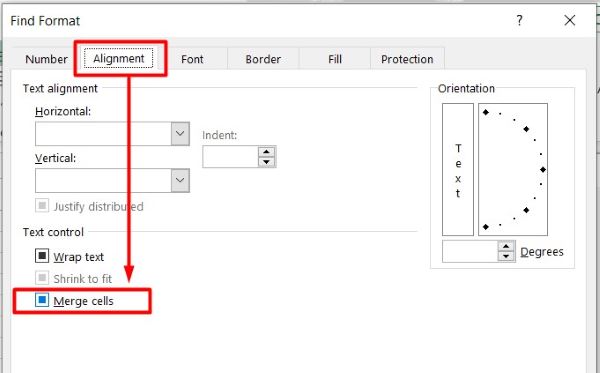
Go to “Alignment” tab. Check the “Merged cells” option to target merged cells specifically, and then confirm your selection by clicking “OK”. This action directs Excel to search for and select all merged cells in the spreadsheet.
6. Review Highlighted Merged Cells
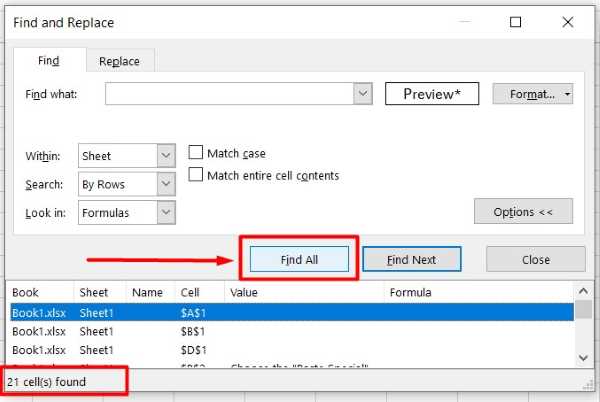
In the “Find & Replace” Dialogue Box, select “Find All.” Excel will highlight all merged cells on the worksheet, allowing for a thorough review and assessment. Then, inspect these cells and determine if any adjustments are needed.
We hope you now better understand how to find merged cells in Excel. If you enjoy this article, you might also like our article on how to fix the issue if you CANNOT copy merged cells in Excel or our article on how to Merge Cells with SAME Value in Excel.

