How to Convert Excel to PDF in Landscape (Easiest Way in 2025)
In this article, we will show you how to convert Excel to a PDF in landscape format. Simply follow the steps below.
Convert Excel to PDF in Landscape Format
Follow the steps below to save Excel as PDF in landscape format.
1. Change the Page Orientation to Landscape
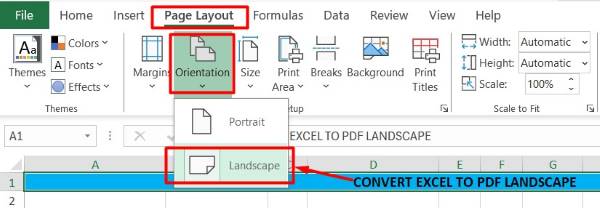
Firstly, go to the “Page Layout” tab at the top of the screen. In the “Page Setup” group, click on “Orientation” and select “Landscape”. This changes the page layout to landscape mode, making it wider than it is tall.
2. Set the Print Area
Highlight the specific area of your worksheet that you want to include in the PDF. In the “Page Layout” tab, click on “Print Area” in the “Page Setup” group. Then, select “Set Print Area”. This ensures that only the selected cells will be included in the PDF.

3. Review the Print Settings
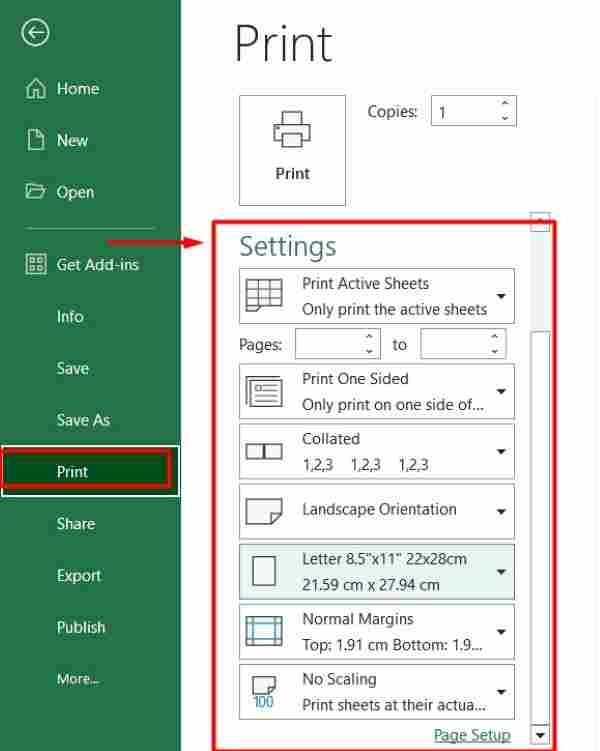
Select “File” in the top menu and click on “Print”. The print settings and preview will open. Review the preview to ensure the content fits well on the page and no data is cut off. After that, adjust the margins, scaling, and other settings as needed.
4. Save the File as a PDF
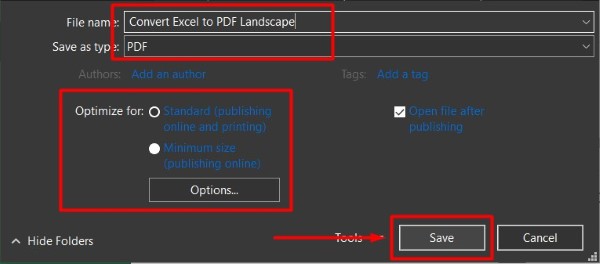
In the “File” menu, select “Save As”. Choose the location where you want to save the PDF file. Afterwards, in the “Save as type” dropdown menu, select “PDF”. This prepares the file to be saved in PDF format.

5. Select the PDF Options
A dialog box will appear after you select PDF. Make sure the “Optimize for” option is set to “Standard (publishing online and printing)”. Then, check the “Open file after publishing” box if you want to view the PDF immediately after saving. This step ensures the PDF is high quality and opens automatically.
We hope that you now have a better understanding of how to convert Excel to a PDF in landscape format. If you enjoyed this article, you might also like our article on ways to remove extra pages in Excel PDF or our article on how to copy table from PDF to Excel.

