How to Remove Duplicates in Excel but Keep One (2025 Update)
In this article, we will show you how to remove duplicates but keep one in Excel. Simply follow the steps below.
How to Delete Duplicates in Excel but Keep One
To delete duplicates in Excel but keep one, you can consider two methods: the ‘Remove Duplicates’ feature and the ‘Advanced Filter’. We will cover how to use each method in the following sections.
Method 1: Using Remove Duplicates Feature
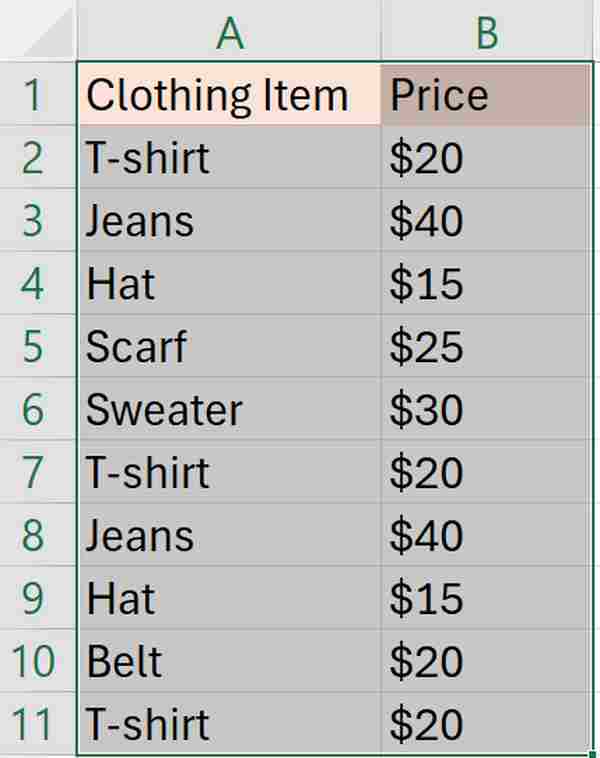
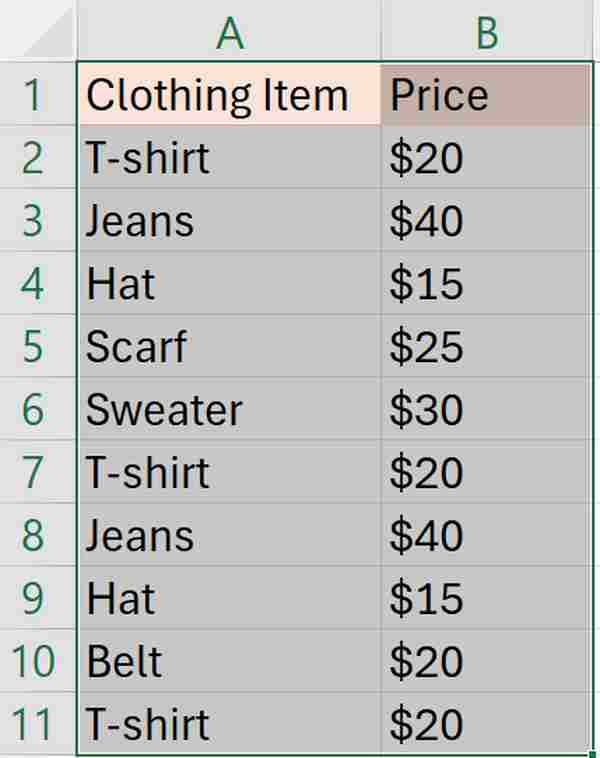
To use the Remove Duplicates feature, we will work with a dataset containing clothing items in Column A and prices in Column B. Follow the steps below:
1. Select the Data Range
Click and drag to highlight the cells from A1 to B11. This includes both columns, “Clothing Item” and “Prices.” By selecting this range, you tell Excel to consider both columns when it checks for duplicates.
2. Access the Remove Duplicates Tool
Navigate to the “Data” tab located on the upper Ribbon of Excel. Look for the ‘Data Tools’ group and click on “Remove Duplicates.” This action opens a dialog box that allows you to select the columns to be checked for duplicates.

3. Specify Columns for Duplicate Check
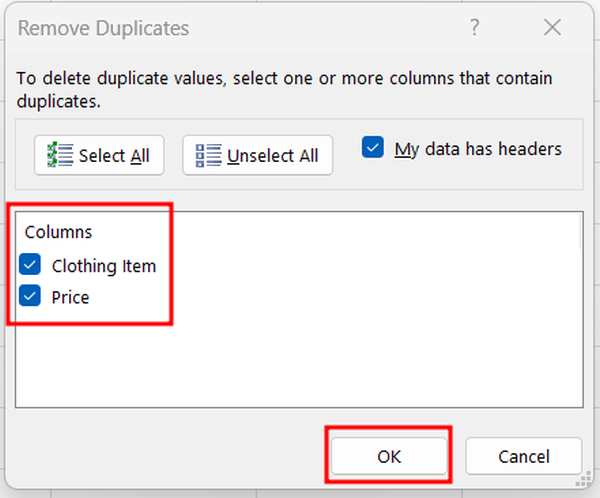
In the Remove Duplicates dialog box, make sure the checkboxes for both Column A and Column B are selected. This ensures that Excel considers both the clothing item and its price as a single unique identifier. Press “OK” to proceed.
4. Confirm Deletion of Duplicates
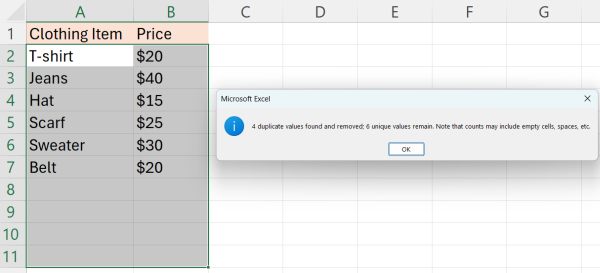
Excel will now process your selected data and remove any duplicate rows. After the operation is complete, a summary dialog will pop up indicating how many duplicates were found and removed, and how many unique entries are left.
Method 2: Using Advanced Filter
Follow the steps below to delete duplicates in Excel using the Advanced Filter.
1. Open the Advanced Filter Dialog
First, select your entire dataset from A1 to B11.
Then, on the “Data” tab in the Excel Ribbon, click “Advanced” within the ‘Sort & Filter’ group. This action opens the Advanced Filter dialog box where you can set detailed criteria for filtering duplicates.

2. Configure Advanced Filter Options
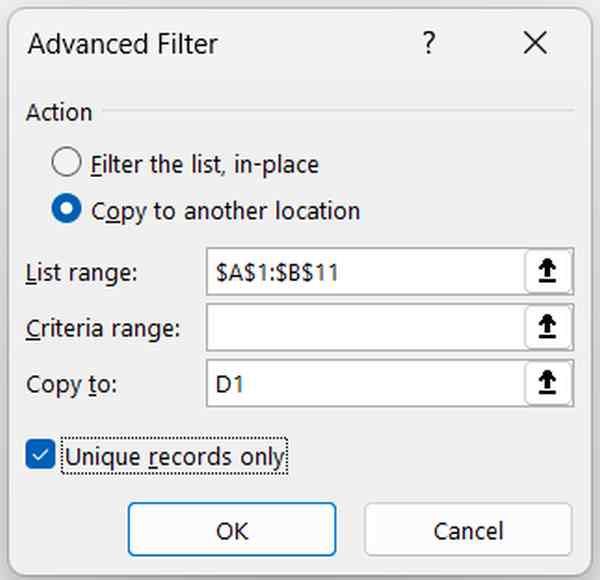
In the Advanced Filter dialog box, choose the “Copy to another location” option to ensure your original data remains unchanged. Enter your current data range (A1 to B11) in the “List range” and specify an empty area, such as starting at D1, in the “Copy to” box. Ensure the “Unique records only” checkbox is checked.
Configuring these options correctly directs Excel to extract and relocate only the unique entries from your original data to a new location, which you specify.
3. Apply the Filter to Extract Unique Records
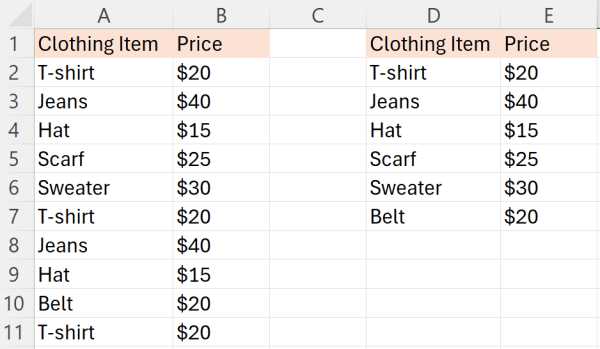
Press “OK” to apply the settings of the Advanced Filter. Excel will then execute the filter and move all unique records to the destination range you specified. Once completed, you can check the area starting at D1 to see your unique dataset.
We hope that you now have a better understanding of how to remove duplicates in Excel but keep one. If you enjoyed this article, you might also like our article on how to hide duplicates in Excel or our article on how to delete duplicates in Excel based on one column.

