Insert PDF into Excel as Image (Easiest Way in 2025)
In this article, we will show you how to insert PDF into Excel as an image. Simply follow the steps below.
Insert PDF into Excel as Image
Below are the steps on how to insert PDF into Excel as an image.
1. Open the PDF File You Want to Insert
First, open the PDF file you want to insert as an image. Use any PDF viewer to open the document. This step is necessary to take a screenshot or use a snipping tool to capture the PDF content.
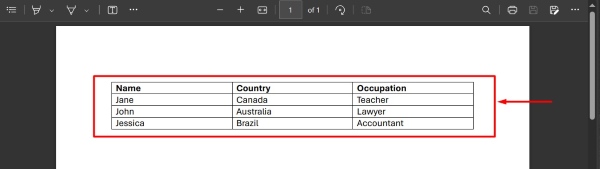
2. Capture the Desired PDF Content as an Image
Use a screenshot tool or a snipping tool to capture the specific part of the PDF you want to insert into Excel. Make sure to save the captured image on your computer.

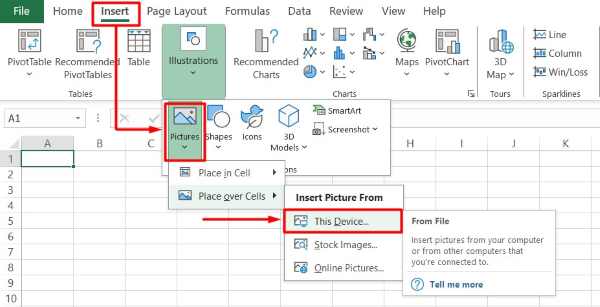
3. Insert the Captured Image into Your Excel Spreadsheet
Go back to your Excel spreadsheet. Click on the cell where you want to insert the image. Go to the “Insert” tab on the Ribbon. Click “Pictures” and select “This Device.” Locate and select the saved image of your PDF content.
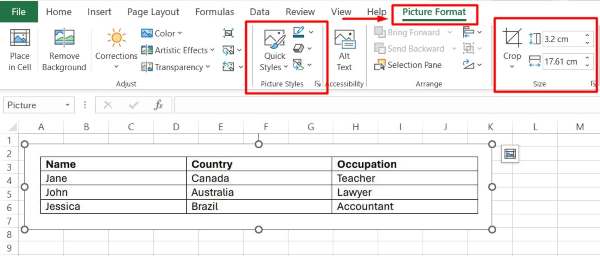
4. Adjust the Inserted Image’s Size and Position
After inserting the image, you may need to adjust its size and position. Click on the image to select it. Use the handles around the image to resize it. Drag the image to the desired position within your spreadsheet.
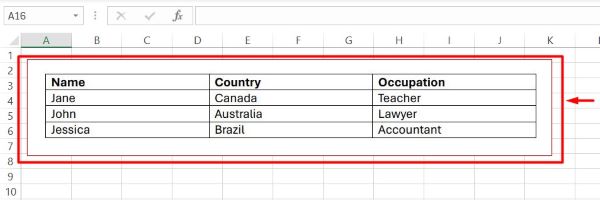
5. Review the Inserted Image in Your Spreadsheet
Check the inserted image to ensure it appears correctly and is positioned as you want it. Make any final adjustments as needed.
We hope that you now have a better understanding of how to insert PDF into Excel as an image. If you enjoyed this article, you might also like our article on ways to attach PDF to Excel or our article on how to save multiple Excel sheets as one PDF.