How to Center the Print Area in Excel (Easiest Way in 2025)
In this article, we will explore how to center the print area in Excel from the Page Layout tab and from the File tab. Simply follow the steps below.
Method 1: How to Center the Print Area in Excel from Page Layout
Follow the steps below to center the print area in Excel using the Page Layout tab.
1. Set the Print Area
Select the range of cells you want to print. For this example, we will print this dataset that contains ten entries.

2. Access the Page Setup Dialog Box
Click the small arrow in the bottom-right corner of the Page Setup group on the Page Layout tab.

3. Adjust the Margins
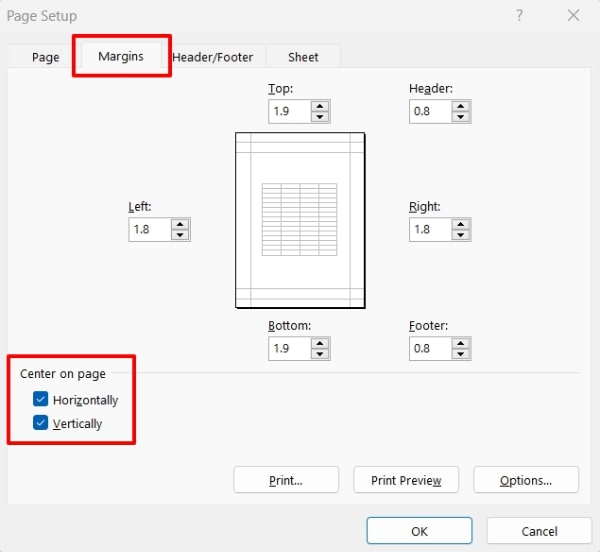
In the Page Setup dialog box, click the Margins tab. Under Center on page, check both Horizontally and Vertically to center the print area on the page.

4. Preview Your Settings
Click File from the Excel ribbon then click Print to see a print preview. Ensure that the content is centered as desired.

5. Print the Centered Worksheet
If everything looks good in the preview, proceed to print your document.

Method 2: How to Center the Print Area in Excel from File Tab
Follow the steps below to center the print area in Excel using the File tab.
1. Set the Print Area
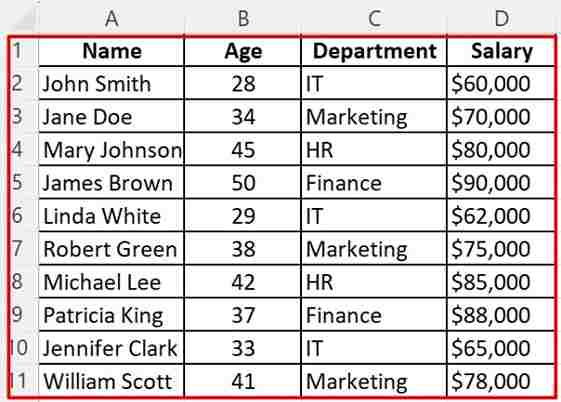
Select the range of cells you want to print. For this example, we will print this dataset that contains ten entries.
2. Access the Print Settings
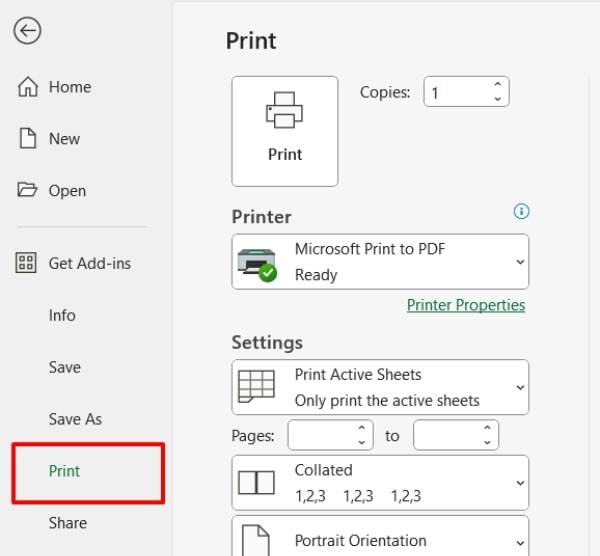
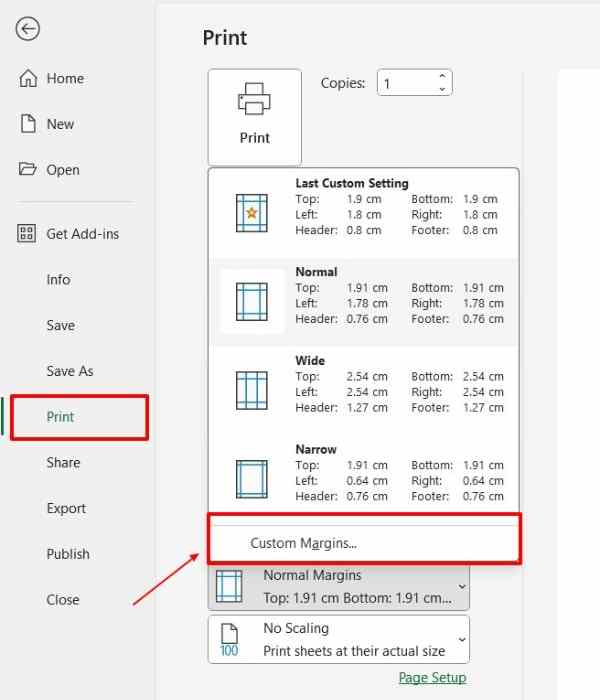
Click the File tab to open the Backstage view then select Print.
3. Access the Margins Settings
In the Print settings, click the Margins drop-down menu and select Custom Margins.
4. Customize the Margins
In the Page Setup dialog box that appears, check both Horizontally and Vertically under Center on page.
5. Preview and Print
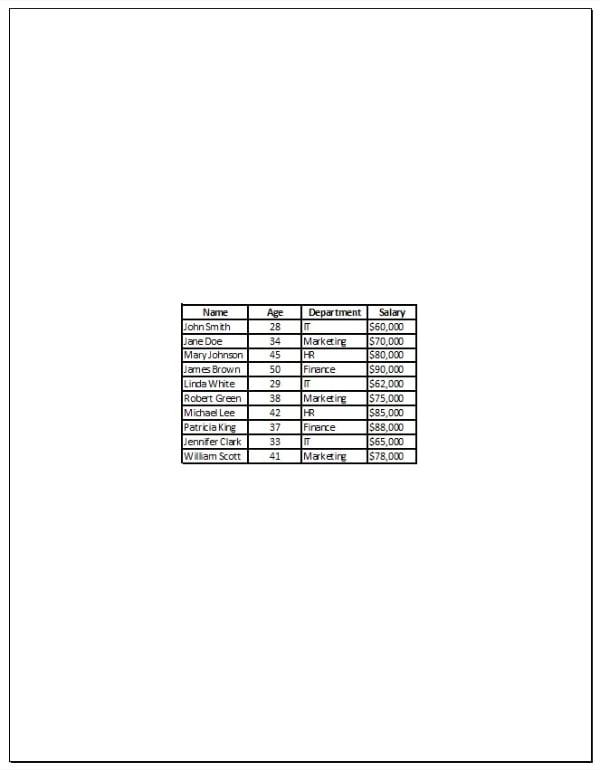
Click OK to apply the changes and see a print preview. Proceed to print your document once you are satisfied.
We hope that you now have a better understanding of how to center the print area in Excel. If you enjoyed this article, you might also like our article on how to print excel with gridlines and how to set print area in excel to one page.

