How to Set Print Area in Excel to Fit One Page (2025 Update)
In this article, we will learn how to set the print area in Excel to fit one page using the Page Layout tab and the Scale to Fit settings. Simply follow the steps below.
Method 1: How to Set Print Area in Excel to One Page Using Page Layout
Follow the steps below to set the print area in Excel to fit one page using the Page Layout tab.
1. Set the Print Area
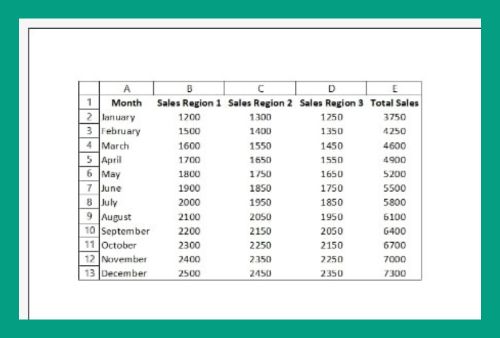
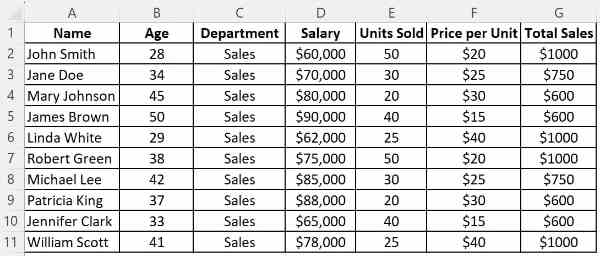
Highlight the range of cells you want to include in your print area. For this example, let us assume this dataset continues up to 50 rows.

2. Open Page Setup
In the Page Layout tab, click on the small arrow in the bottom-right corner of the Page Setup group to open the Page Setup dialog box.

3. Adjust Settings to Fit to One Page
Go to the Page tab. Select the Fit to option and set it to 1 page wide by 1 page tall. Click OK.

4. Check Print Preview
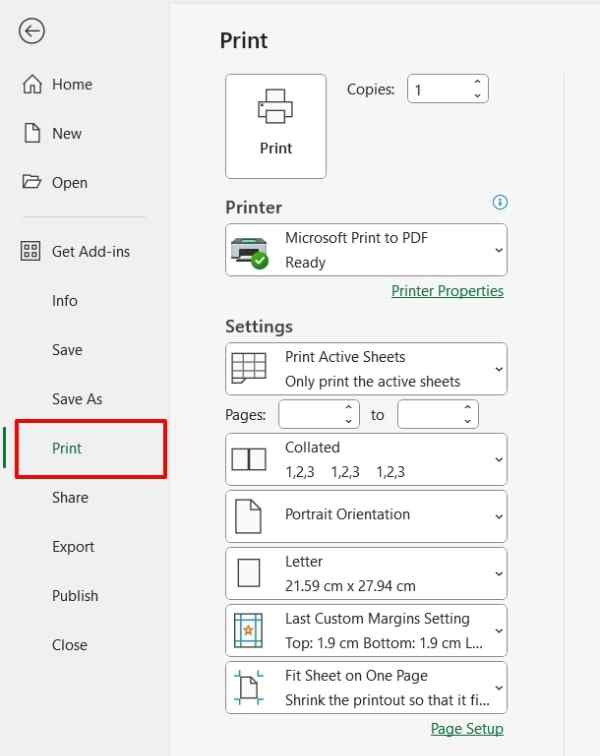
To check how your printout will look, go to File then select Print or simply press Ctrl + P.

5. Adjust and Print
Adjust any additional settings if needed and print your document.

Method 2: How to Set Print Area in Excel to One Page Using Scale to Fit
Follow the steps below to set the print area in Excel to fit one page using the Scale to Fit settings.
1. Set the Print Area
Highlight the range of cells you want to include in your print area. Again, let us assume this dataset continues up to 50 rows.
2. Adjust the Scale to Fit Settings
Find the Scale to Fit group in the Page Layout tab. Set both the Width and Height to 1 page.

3. Check Print Preview
Go to File then select Print or press Ctrl + P to open the print preview.
4. Adjust and Print
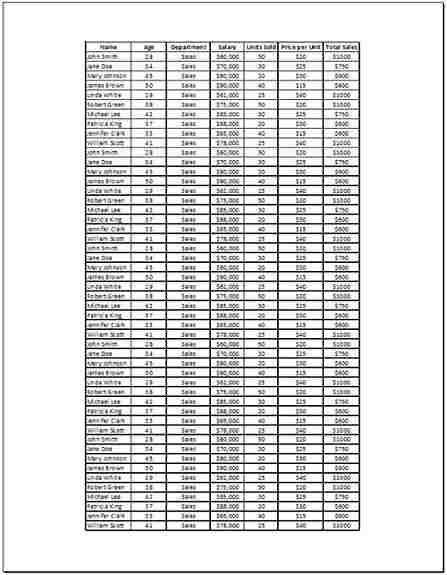
Check how your printout will look. Adjust any additional settings if needed and print your document.
We hope that you now have a better understanding of how to set the print area in Excel to one page. If you enjoyed this article, you might also like our article on how to center print area excel and how to remove print lines in excel.


