How to Highlight Specific Words in Excel (Easiest Way in 2025)
In this article, we will explore how to highlight cells with specific text in Excel using the highlighting menu and conditional formatting. Simply follow the steps below.
Highlight Cells with Specific Text in Excel Using the Highlighting Menu
Follow the steps below to highlight specific texts in Excel.
1. Select Cells in the ‘Author’ Columns to Highlight
In our example, we have a list of book titles in Column A, author names in Column B, and their genres in Column C. You want to highlight based on author names.
Click and drag to select cells in the “Author” column. In our case, let’s highlight Sarah Clarke and Michael Brooks. This selection ensures that only the desired cells will be affected by your highlighting.

2. Use the Fill Color Tool to Highlight Selected Cells
Navigate to the Home tab on the ribbon. In the Font group, click on the Fill Color button, which looks like a paint bucket. A color palette will appear. Choose the color you want to use for highlighting the selected cells. In our case, let’s choose yellow.
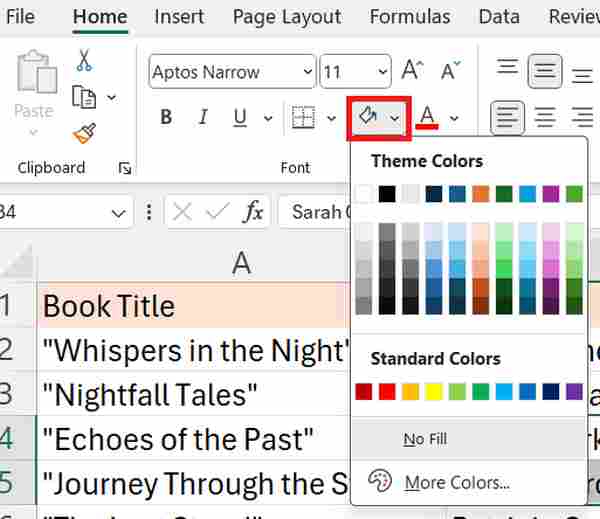
3. See Highlighted Author Names
Now, you have highlighted the selected authors.

Highlight Cells with Specific Text in Excel using Conditional Formatting
To highlight specific text using conditional formatting, we will work with a dataset containing book titles in Column A, author names in Column B, and their genres in Column C. Follow the steps below:
1. Apply Conditional Formatting to the Entire ‘Genre’ Column
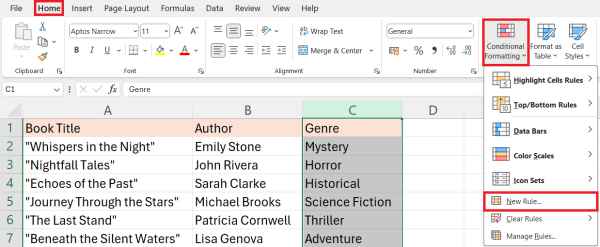
Click on the header of the “Genre” column to select the entire column. This step is important for consistently highlighting specific genres across the entire dataset.

2. Access the Conditional Formatting Menu and Set a New Rule for Specific Text
Stay on the `Home’ tab, and in the `Styles’ group, click on `Conditional Formatting.’ From the dropdown menu, select `New Rule.’ This action will open the New Formatting Rule dialog box, where you can define the conditions for highlighting.
3. Choose the Rule Type and Specify the Text Condition
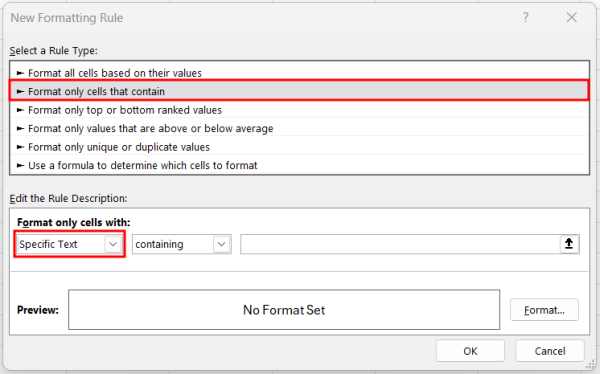
In the New Formatting Rule dialog box, choose the rule type Format only cells that contain. Under Edit the Rule Description, select Specific Text.
4. Enter the Text to Highlight
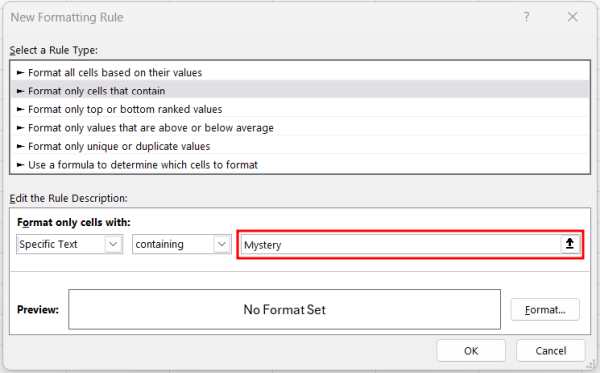
In the box next to containing, type the text you want to highlight, such as “Mystery.” This setup ensures that only cells containing the specified text will be highlighted.
5. Click Format and Choose Highlighting Options
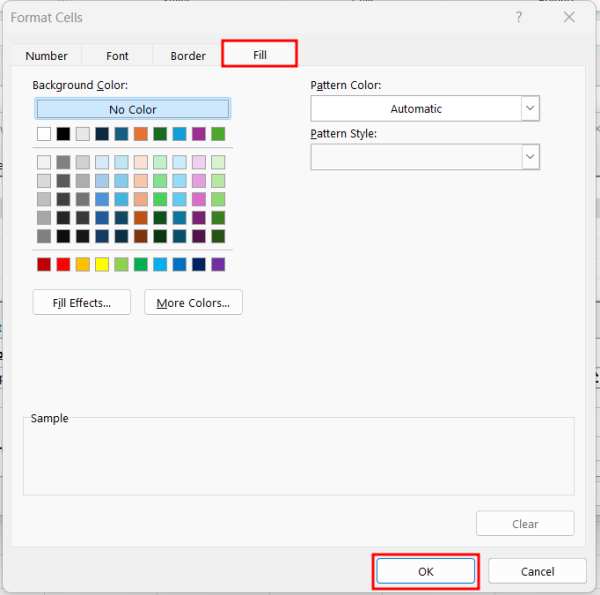
Click Format to open the Format Cells window.
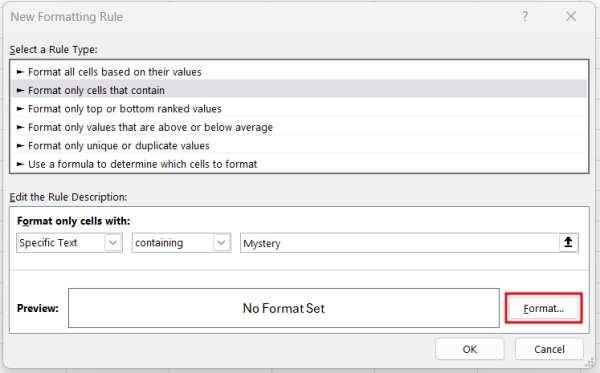
Go to the Fill tab and choose the background color you want to use for highlighting. For our example, let’s choose the color yellow. Once you’ve selected a color, click OK to close the window, and then click OK again in the New Formatting Rule dialog box to apply the rule. This step determines the visual appearance of the highlighted cells.
6. Check Your Worksheet to Ensure the Correct Application of Highlights
Scroll through your worksheet to review and confirm that all cells containing the specified genre, such as “Mystery,” are correctly highlighted.

We hope that you now have a better understanding of how to highlight specific words in Excel. If you enjoyed this article, you might also like our article on how to highlight blanks in Excel or our article on how to highlight specific rows in Excel.

