Excel Multi-Select Listbox: The Ultimate Guide for 2025
In this article, we will show you how to create a multi-select list box in Excel. Simply follow the steps below.
Excel Multi Select Listbox
Follow the steps below on how to create a multi-select list box in Excel.
1. Select Cells Where You Want the Drop-Down List
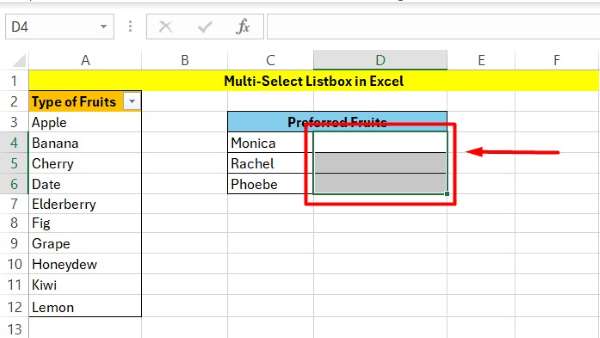
Firstly, select one or more cells where you want to insert the drop-down list. In this example, we will use cells D4:D6. These cells will contain the drop-down list which allows you to choose items from a predefined set.
2. Access Data Validation Options
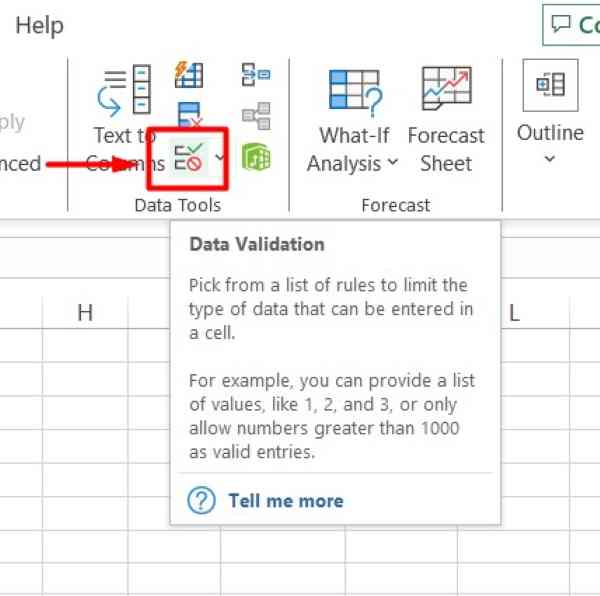
Next, go to the Data tab on the Excel ribbon. In the Data Tools group, find and click Data Validation. This will open the Data Validation dialog box where you can set up your drop-down list.
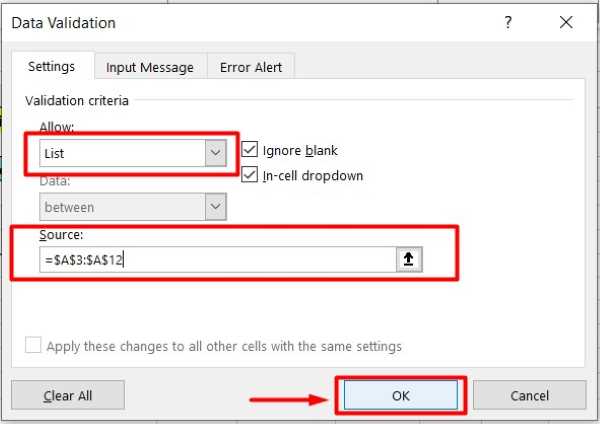
3. Choose List from Allow Drop-Down
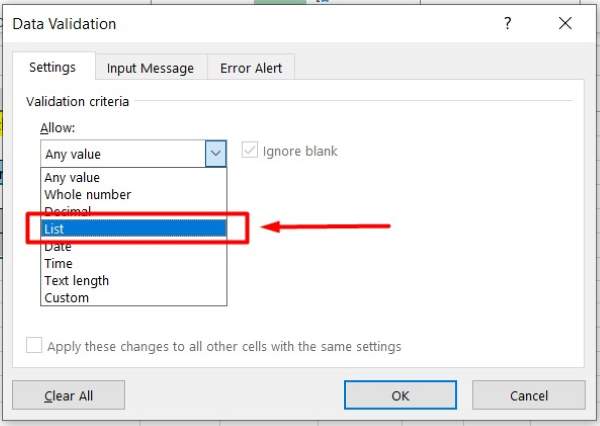
In the Data Validation dialog box, click the “Allow” drop-down box and select “List”. This option tells Excel that you want to create a list of items from which users can select.
4. Define Source Range for Drop-Down Items
After that, in the Source box, specify the range of cells that contains the items for your drop-down list. For this example, type =Table1 if your table is named Table1. Alternatively, if you are using a specific range, type =$A$3:$A$12 to select cells A3 to A12. This will ensure the drop-down list includes all items in this range.
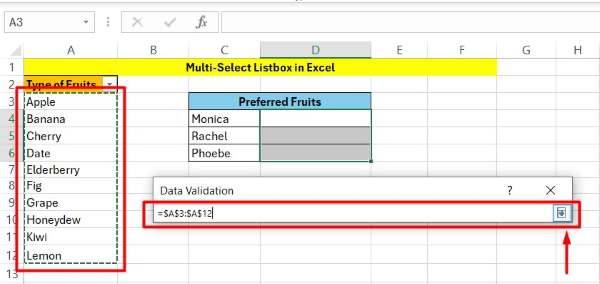
5. Confirm and Apply Data Validation
Click “OK” to apply the data validation rules. The selected cells (D4:D6) will now contain drop-down arrows, allowing users to select from the list of items specified in the source range.
6. Open the Visual Basic Editor in Excel
Press “Alt + F11” to open the Visual Basic for Applications (VBA) editor, or go to the “Developer” tab and click “Visual Basic.” If the Developer tab is not visible, you may need to enable it in Excel options under Customize Ribbon. Alternatively, right-click the sheet’s tab in Excel and choose “View Code” from the context menu to access the same Code window.
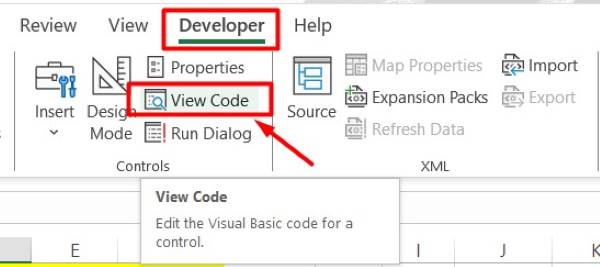
8. Paste VBA Code into the Worksheet Code Window
In the Code window, paste the following VBA code. This code allows multiple selections in the drop-down list and appends the new selections to the existing value, separated by a comma.
```
Option Explicit
Private Sub Worksheet_Change(ByVal Destination As Range)
    Dim DelimiterType As String
    Dim rngDropdown As Range
    Dim oldValue As String
    Dim newValue As String
    DelimiterType = ", "
    If Destination.Count > 1 Then Exit Sub
    On Error Resume Next
    Set rngDropdown = Cells.SpecialCells(xlCellTypeAllValidation)
    On Error GoTo exitError
    If rngDropdown Is Nothing Then GoTo exitError
    If Intersect(Destination, rngDropdown) Is Nothing Then
        'do nothing
    Else
        Application.EnableEvents = False
        newValue = Destination.Value
        Application.Undo
        oldValue = Destination.Value
        Destination.Value = newValue
        If oldValue = "" Then
            'do nothing
        Else
            If newValue = "" Then
                'do nothing
            Else
                Destination.Value = oldValue & DelimiterType & newValue
                ' add new value with delimiter
            End If
        End If
    End If
exitError:
    Application.EnableEvents = True
End Sub
Private Sub Worksheet_SelectionChange(ByVal Target As Range)
    ' Optional: Add code here if needed
End Sub
```
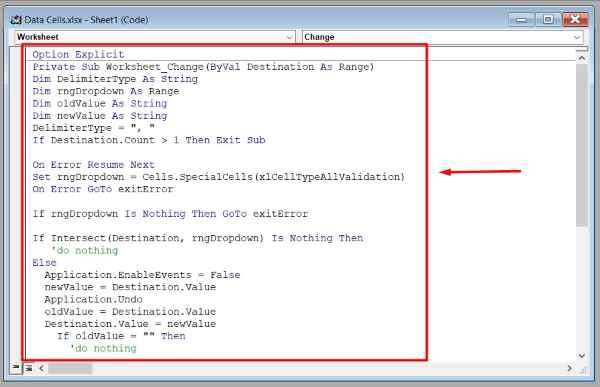
9. Close the Visual Basic Editor
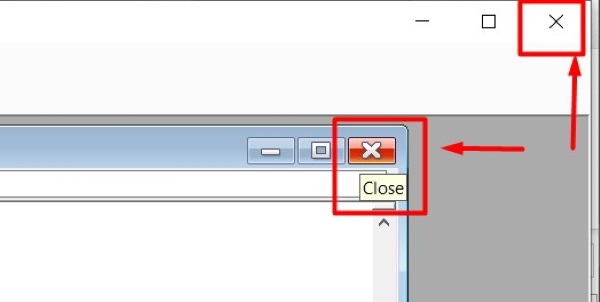
After pasting the code, close the Visual Basic Editor by clicking the X button in the top-right corner of the window or by pressing Alt + Q. This will return you to the Excel worksheet.
10. Save Workbook as a Macro-Enabled File
To ensure your VBA code is preserved, save your Excel file as a “Macro-Enabled Workbook (.xlsm).” Go to “File > Save As,” and in the Save as type dropdown, select “Excel Macro-Enabled Workbook (.xlsm).” This will allow the macros to run properly each time you open the workbook.

We hope you now have a better understanding of how to create a multi-select listbox in Excel. If you enjoy this article, you might also like our article on how to create a list box in Excel or our article on how to remove drop down box in Excel.

