How to Attach PDF in Excel (Easiest Way in 2025)
In this article, we will show you how to attach PDF in Excel. Simply follow the steps below.
Attach PDF to Excel
Follow the steps below on how to attach a PDF file in Excel.
1. Select the Cell for PDF Insertion
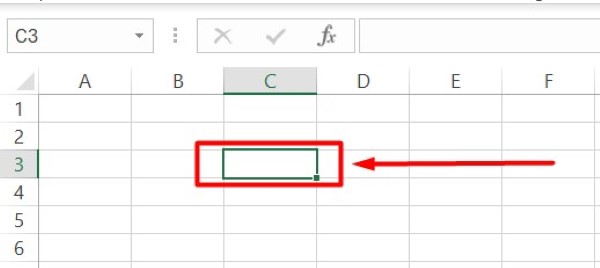
Firstly, click on the cell where you want the PDF to be inserted. This cell will display the PDF icon once it is added.
2. Go to Insert Tab and Click Object
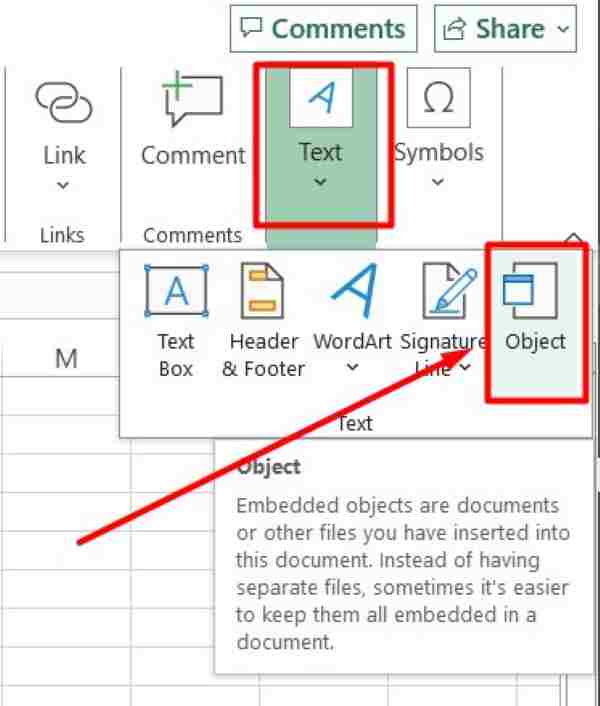
Navigate to the “Insert” tab located on the Excel ribbon at the top of the screen. Within this tab, find the “Text” group and click on the “Object” button. This action will open the Object dialog box where you can add your PDF.
3. Choose Create from File in Object Dialog Box
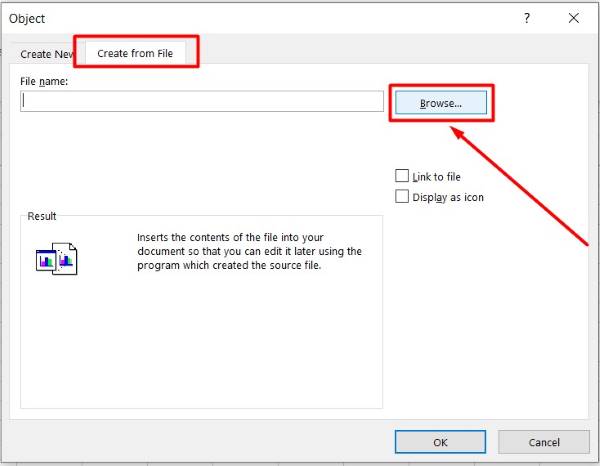
In the Object dialog box, switch to the “Create from File” tab. Here, you will see an option to browse for the file you want to insert. Then, click on the “Browse” button to open a file explorer window.
4. Browse and Select the PDF File
After that, use the file explorer window to navigate to the location of your PDF file. Once you find the file, select it by clicking on it, and then click the “Insert” button to add it to the Object dialog box.

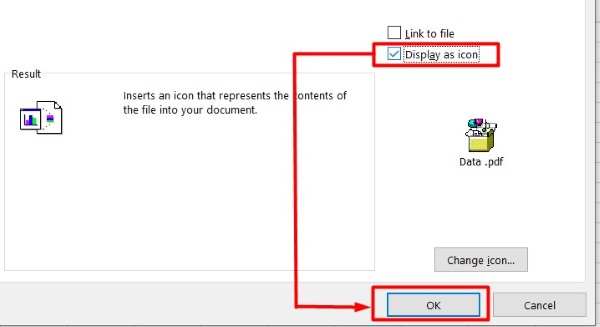
5. Enable Display as Icon Option
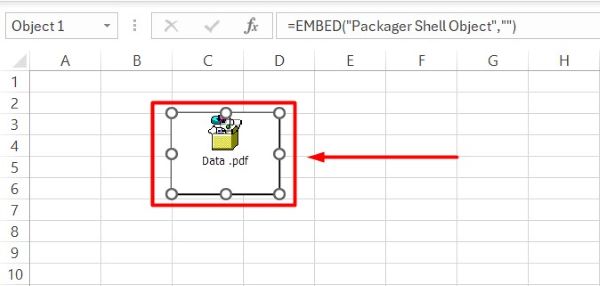
In the Object dialog box, ensure you check the box labeled “Display as icon.” This option allows the PDF to be displayed as an icon in the Excel sheet rather than showing its contents directly. After selecting the PDF file and enabling the display as an icon, click the “OK” button in the Object dialog box. The PDF icon will now appear in the cell you selected in step 1.
6. Adjust the Position of the PDF Icon
If the PDF icon is not positioned exactly where you want it, click and drag the icon to adjust its placement within the cell. You can move it to any position that suits your layout preferences.
We hope that you now have a better understanding of how to attach PDF in Excel. If you enjoyed this article, you might also like our article on ways to print Excel to PDF or our article on how to insert PDF into Excel as image.

