How to Fit an Excel Sheet on One Page PDF (Easiest Way in 2025)
In this article, we will show you how to fit an Excel sheet on one page PDF. Simply follow the steps below.
Fit to Page Excel to PDF
Follow the steps below on how to save Excel as PDF and fit to page.
1. Set Page Orientation to Landscape
Open your Excel file. Go to the ‘Page Layout’ tab at the top of the screen. In the ‘Page Setup’ group, click on ‘Orientation’. From the dropdown menu, select ‘Landscape’.

2. Select and Define the Print Area
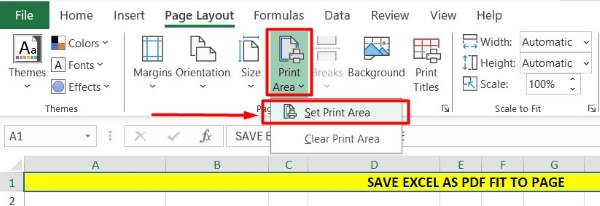
Select the cells that you want to print by clicking and dragging over them. Once selected, go to the ‘Page Layout’ tab. In the ‘Page Setup’ group, click on ‘Print Area’, then choose ‘Set Print Area’.
3. Open Page Setup Dialog Box
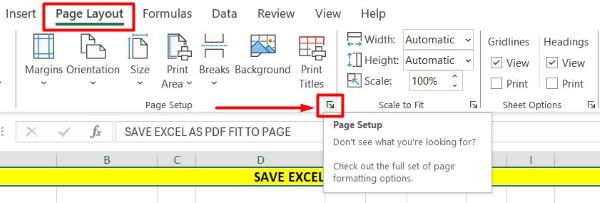
Stay in the ‘Page Layout’ tab. Look at the bottom-right corner of the ‘Page Setup’ group. You’ll see a small arrow pointing downwards; click this arrow. This will open the ‘Page Setup’ dialog box where you can adjust more detailed settings.
4. Fit the Sheet to One Page
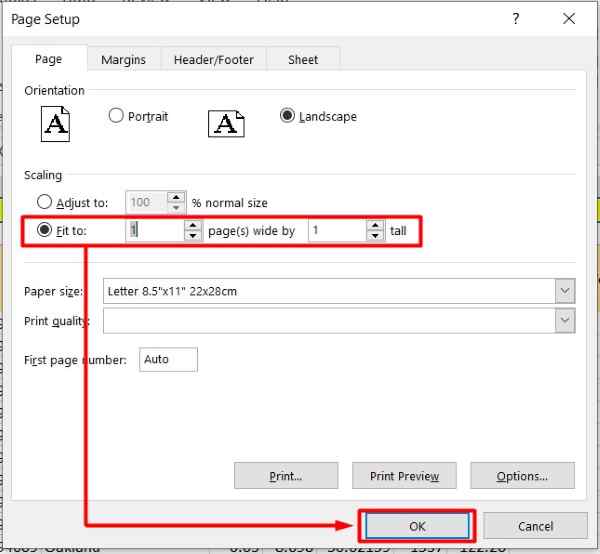
In the ‘Page Setup’ dialog box, click on the ‘Page’ tab. Under the ‘Scaling’ section, select the option ‘Fit to’. Set the width to 1 page wide and the height to 1 page tall. This will scale your entire sheet to fit on a single page when printed or saved as a PDF.
5. Preview the Print Layout
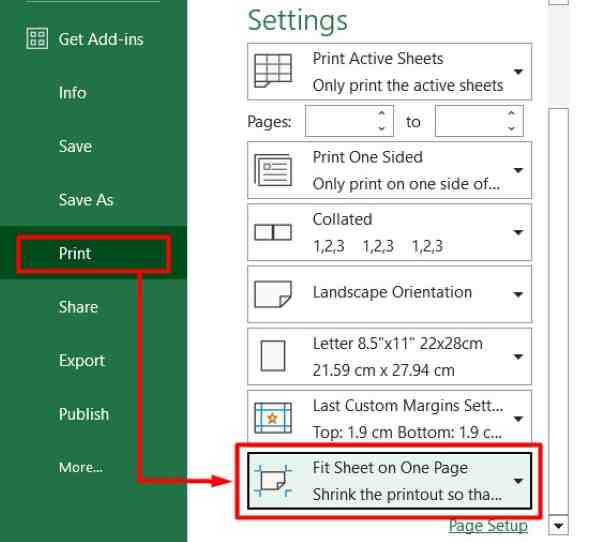
Click ‘File’ in the top-left corner of Excel, then choose ‘Print’. This will open the print preview window. Review the preview to make sure all your data fits on one page. If it doesn’t, go back and adjust your settings.
6. Save the Excel Sheet as a PDF
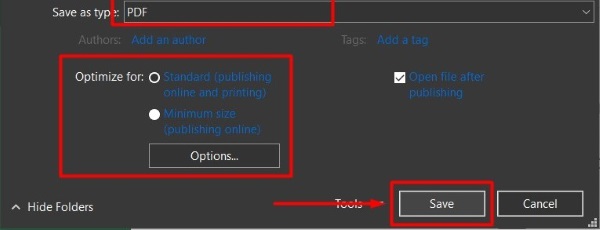
In the print preview window, click ‘File’ again, then select ‘Save As’. Choose the location where you want to save your file. In the ‘Save as type’ dropdown menu, select ‘PDF’. Finally, click ‘Save’. Your Excel sheet is now saved as a one-page PDF.
We hope you now have a better understanding of how to fit an Excel sheet on one page PDF. If you enjoyed this article, you might also like our article on ways to import table from PDF to Excel or our article on how to print Excel to PDF.

