How to Save Excel as PDF on One Page (Easiest Way in 2025)
In this article, we will explore how to convert Excel to PDF on one page. Simply follow the steps below.
How to Convert Excel to PDF in One Page
Below are some of the most common methods to save Excel as PDF on one page.
Using the Save As Function
Follow the steps below to easily convert Excel to PDF on one page using the save as function.
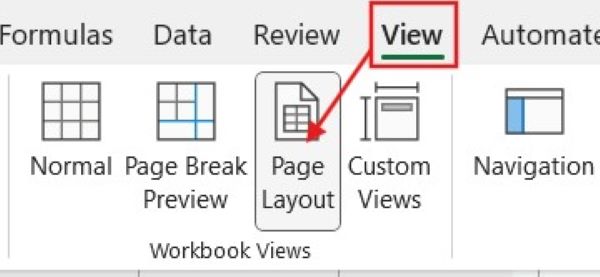
1. Switch to “Page Layout” View
Switch to Page Layout view by clicking the “View” tab at the top of the Excel window, then selecting “Page Layout.” This view allows you to see how your spreadsheet will appear when saved on one page, making it easier to adjust the layout to fit on one page.
2. Fit Content within Page Boundaries
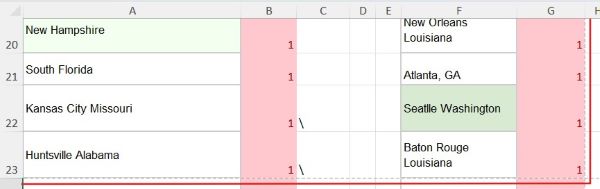
Ensure that none of your data extends beyond the printable area of the page. If any data does extend beyond, adjust the column widths or row heights accordingly to fit everything within the page boundaries. In the example here, the dotted lines beside column G and row 23 are the page boundaries.
3. Adjust the Font Size and Formatting (if necessary)
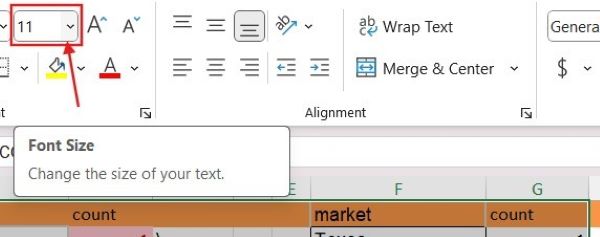
If your data is still not fitting within one page after adjusting column widths and row heights, consider reducing the font size or adjusting formatting to make the content more compact.
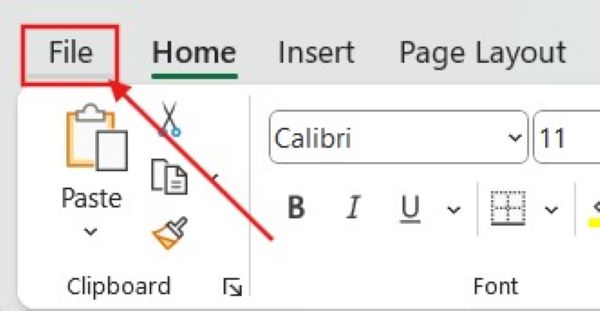
4. Go to the “File” menu
Click on the “File” tab located in the top-left corner of the Excel window.
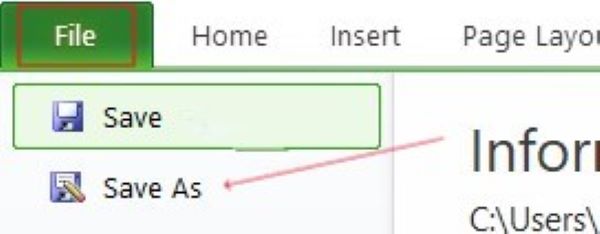
5. Select “Save As”
In the File menu, choose “Save As” from the options.
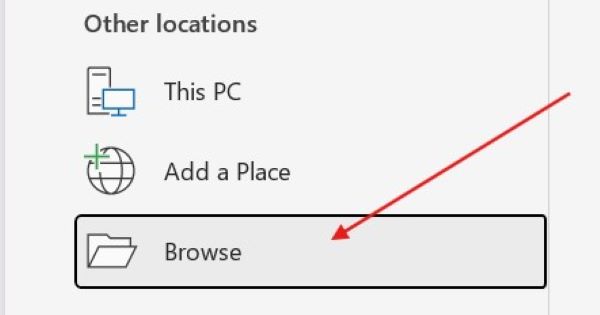
6. Choose a Location
Pick the location on your computer where you want to save the PDF file.
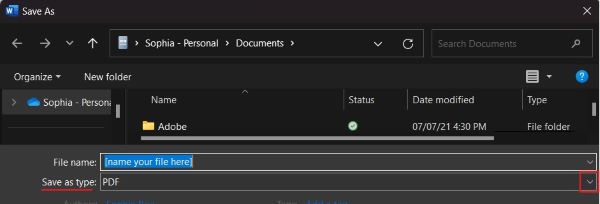
7. Name your File
Enter a name for your PDF file in the “File name” field.
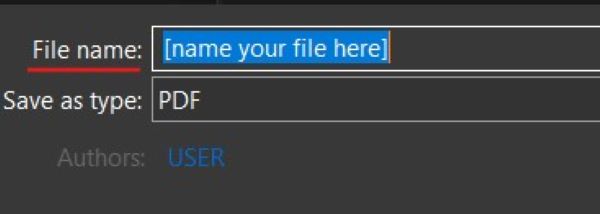
8. Choose PDF Format
Click the dropdown menu next to “Save as type.” Select “PDF (*.pdf)” from the list of options.
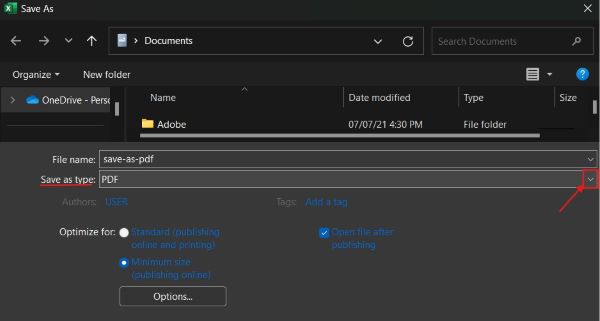
9. Options (if available)
Depending on your version of Excel, you might see additional options related to PDF settings. Adjust these options as desired.
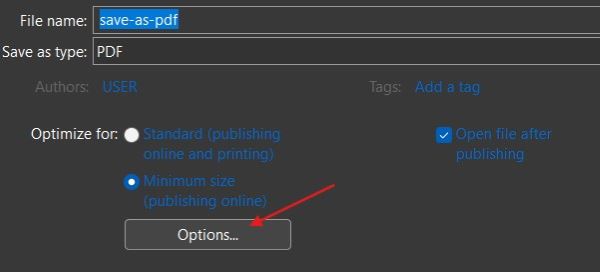
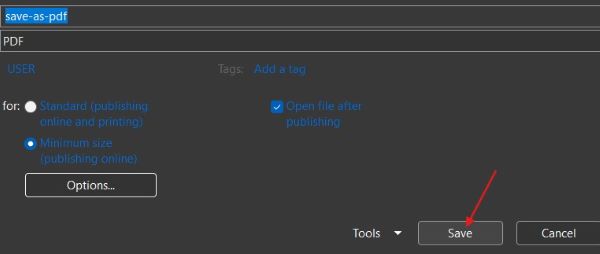
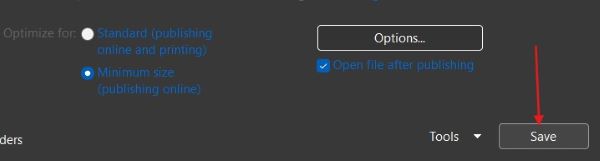
10. Click “Save”
Once you’ve selected the PDF format and adjusted any options, click the “Save” button.
11. Verify the PDF
Navigate to the location where you saved the PDF file. Open the PDF to ensure that your Excel spreadsheet is saved on one page.
Using the “Print” Function
To save Excel as a PDF on one page using the print function, follow the steps below.
1. Switch to “Page Layout” View
Switch to Page Layout view by clicking the “View” tab at the top of the Excel window, then selecting “Page Layout.” This view allows you to see how your spreadsheet will appear when saved on one page, making it easier to adjust the layout to fit on one page.

2. Fit Content within Page Boundaries
Ensure that none of your data extends beyond the printable area of the page. If any data does extend beyond, adjust the column widths or row heights accordingly to fit everything within the page boundaries. In the example here, the dotted lines beside column G and row 23 are the page boundaries.

3. Adjust the Font Size and Formatting (if necessary)
If your data is still not fitting within one page after adjusting column widths and row heights, consider reducing the font size or adjusting formatting to make the content more compact.

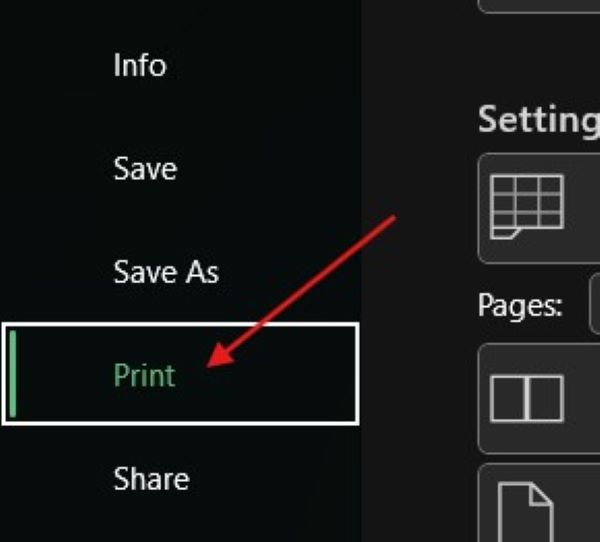
4. Go to the “File” menu
Click on the “File” tab located in the top-left corner of the Excel window.

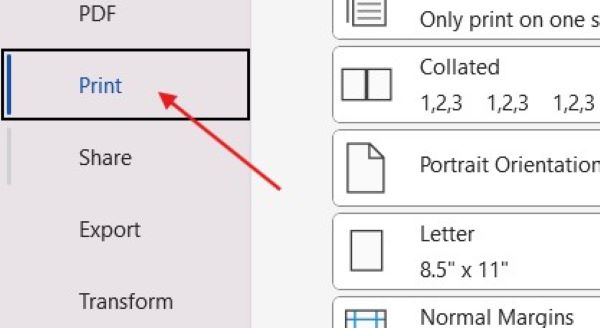
5. Select “Print”
In the File menu, choose “Print” from the options.
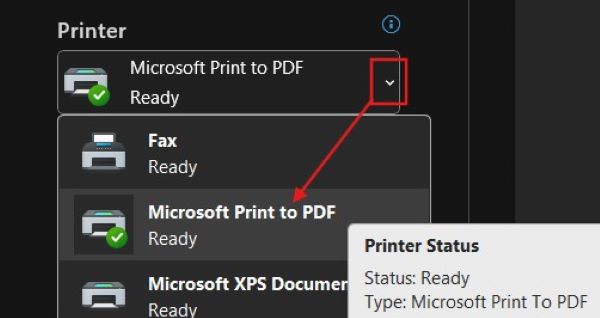
6. Choose “Microsoft Print to PDF”
In the Printer dropdown menu, select “Microsoft Print to PDF” or any PDF printer you have installed.
7. Adjust Print Settings
Navigate to the print settings section. Ensure that the “Fit Sheet on One Page” option is selected. This will automatically adjust the scaling to fit your content on one page.

8. Preview and Adjust
Use the preview window to verify that your content fits on one page. If necessary, adjust settings such as margins, scaling, and orientation to ensure everything fits neatly.
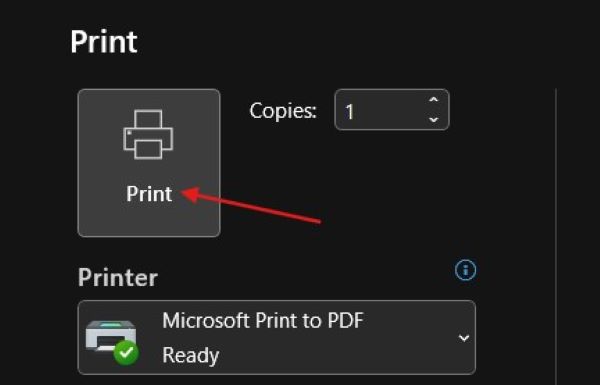
9. Click “Print”
Once you’re satisfied with the preview and settings, click the “Print” button to proceed.
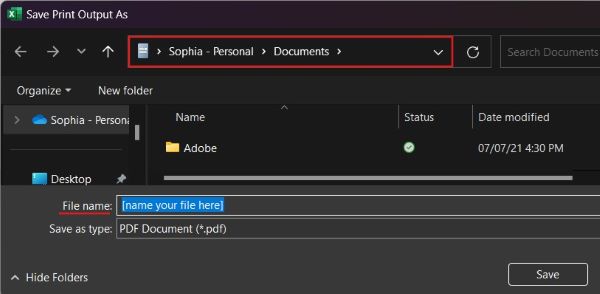
10. Choose a Location and Name Your File
A dialog box will appear, prompting you to choose a location on your computer to save the PDF file. Enter a name for your PDF file in the designated field.
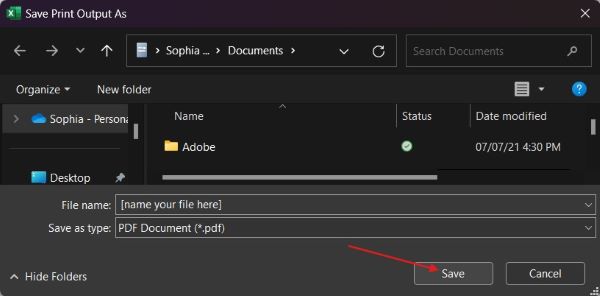
11. Save Your PDF
Click the “Save” button to save your Excel spreadsheet as a PDF on one page.
12. Verify the PDF
Navigate to the location where you saved the PDF file. Open the PDF to ensure that your Excel spreadsheet is saved on one page.
Using Microsoft Word as an Intermediary
In this section, you’ll learn to use Microsoft Word as an intermediary to convert Excel to PDF on one page.
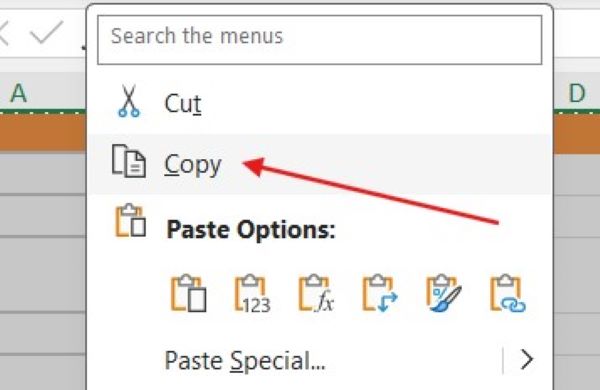
1. Copy Your Content
On your Excel spreadsheet, select the cells, columns, or rows that you want to include in the PDF. Right-click on the selected area and choose “Copy” from the context menu, or press Ctrl + C on your keyboard.
2. Open Microsoft Word
Launch Microsoft Word on your computer.
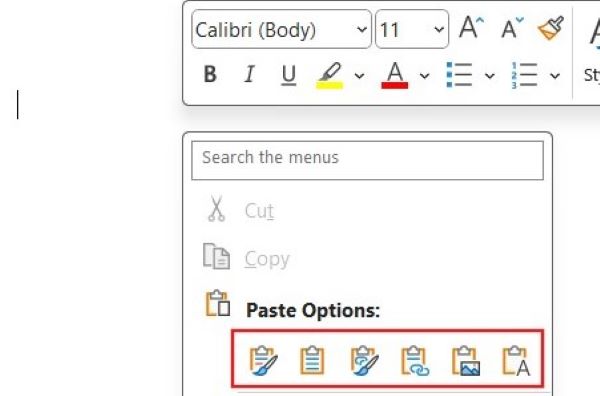
3. Paste Your Content
In a new Word document, right-click on the blank page and choose “Paste” from the context menu, or press Ctrl + V on your keyboard. Your Excel content will be pasted into the Word document.
4. Adjust the Layout and Formatting
Resize or adjust the layout of the content in Word to fit on one page. You may need to adjust font sizes, margins, or spacing to ensure everything fits neatly.
5. Preview the Document
Preview using the Print feature in Word to see how your content will appear when printed. Ensure that all content fits on one page and appears as desired. Once you’re done previewing and adjusting settings, you can exit the Print Preview by clicking the back arrow.
6. Go to the “File” Menu and Select “Save As”
Click on the “File” tab located in the top-left corner of the Word window. Choose “Save As” from the options.

7. Choose PDF Format
In the Save As dialog box, choose “PDF (*.pdf)” from the “Save as type” dropdown menu.
8. Name Your File and Select a Location
Enter a name for your PDF file in the “File name” field. Choose the location on your computer where you want to save the PDF file.

9. Click “Save”
Once you’ve entered the file name and chosen a location, click the “Save” button.
10. Verify the PDF
Navigate to the location where you saved the PDF file. Open the PDF to ensure that your Excel content is saved on one page.
We hope that you now have a better understanding of how to save Excel as PDF on one page.
If you enjoyed this article, you might also like our article on how to export Excel to PDF or our article on how to remove extra pages in Excel PDF.