How to Remove Print Lines in Excel (Easiest Way in 2025)
In this article, we will learn how to remove print lines in Excel from the View taskbar and from the Advanced Options. Simply follow the steps below.
Method 1: How to Remove Print Lines in Excel From The View Taskbar
Follow the steps below to get rid of print lines in Excel from the View Taskbar.
1. Open the Page Break Preview
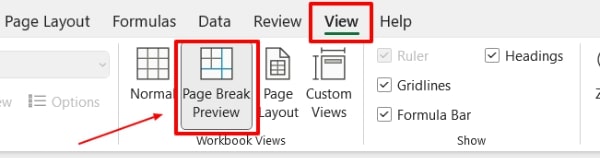
Click on the View tab located on the top ribbon. In the Workbook Views group, click on Page Break Preview.
2. Switch to Normal View
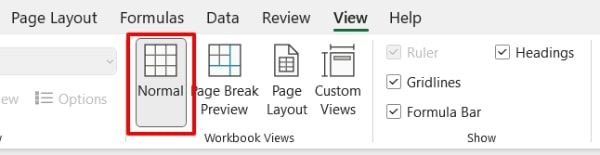
In the Page Break Preview mode, you can see the blue print lines indicating page breaks. To remove these, switch back to normal view by clicking Normal in the Workbook Views group.
3. Remove Page Breaks Manually (if needed)
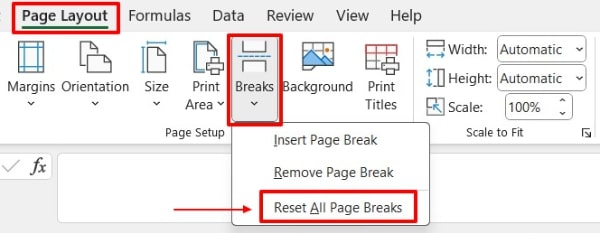
Sometimes, manual page breaks might still be visible. To remove these, you can go to the Page Layout tab, click on Breaks in the Page Setup group, and select Reset All Page Breaks.
Method 2: How to Remove Print Lines in Excel From Advanced Options
Follow the steps below to remove print lines in Excel from the the Advanced Options.
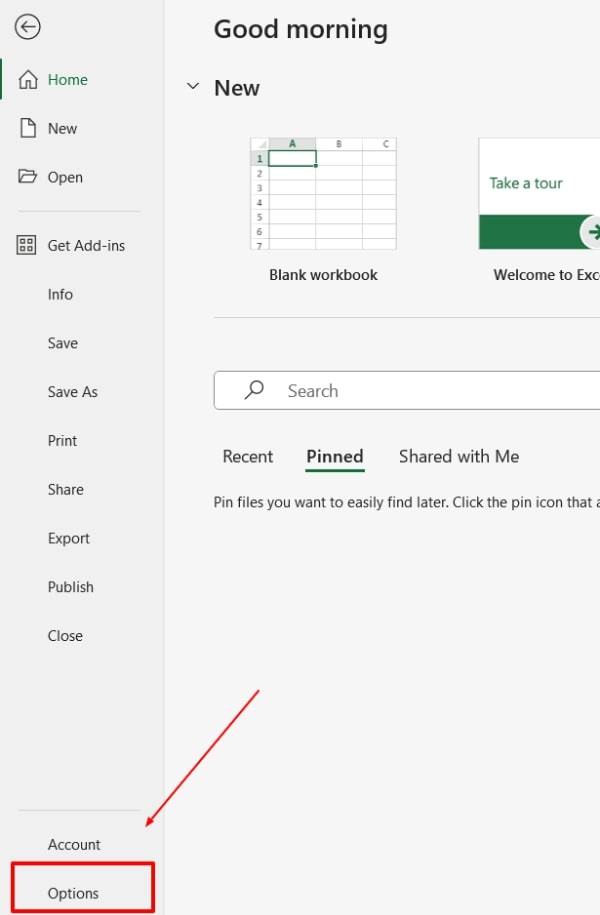
1. Access the File Menu
Click on the File tab in the upper-left corner of the Excel window. Scroll down and click on Options. This will open the Excel Options dialog box.
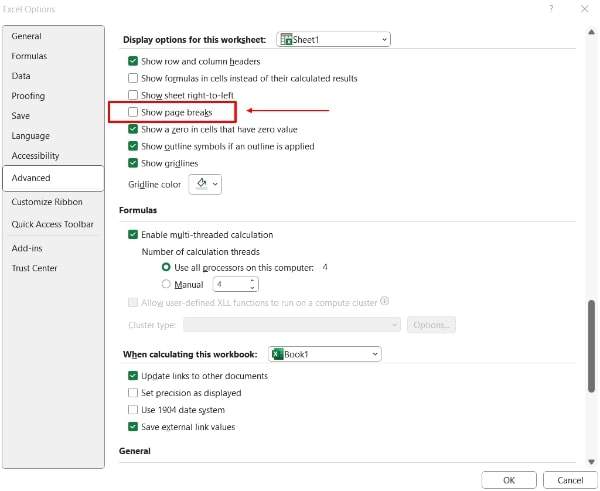
2. Navigate to Advanced Options
Click on Advanced in the left-hand menu. Scroll down to the section titled Display options for this worksheet.
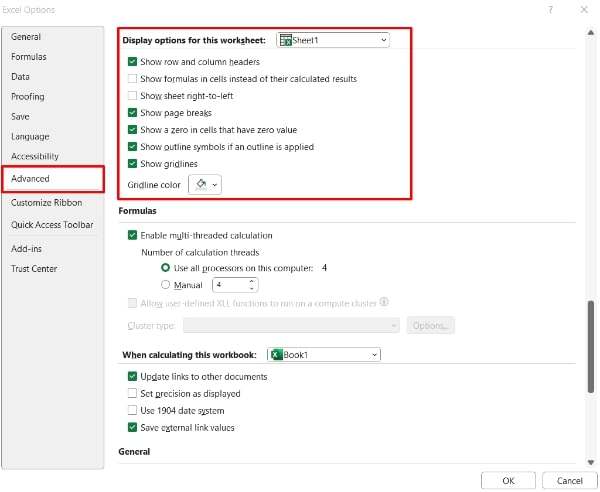
3. Uncheck Page Breaks
Find the checkbox labeled Show page breaks and uncheck it. This will remove the print lines from the selected worksheet.
We hope that you now have a better understanding of how to remove print lines in Excel. If you enjoyed this article, you might also like our article on how to set print area in excel to fit one page and how to print rows and columns in excel.