How to Highlight Changes in Excel (Easiest Way in 2025)
In this article, we will show you how to highlight changes in Excel. Simply follow the steps below.
Highlight Changes in Excel
Follow the steps below on how to highlight changes in Excel.
1. Open Excel Online and Go to Review Tab
Open your Excel document in the online browser version. This online version allows multiple users to collaborate in real-time. Look for the “Review” tab in the ribbon at the top of the screen and click on it. This tab contains various tools for reviewing and tracking changes.

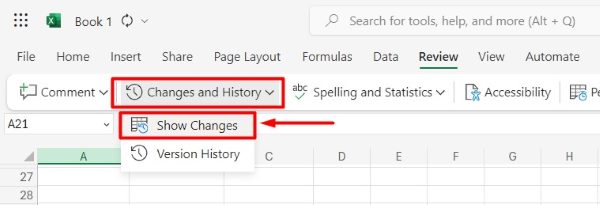
2. Click on Show Changes to Track Edits
In the “Review” tab, locate “Changes and History.” Then, click on the “Show Changes” button. This feature will enable tracking of all modifications made to your document, allowing you to see who made changes and when they were made.
3. View Changes in the Show Changes Panel
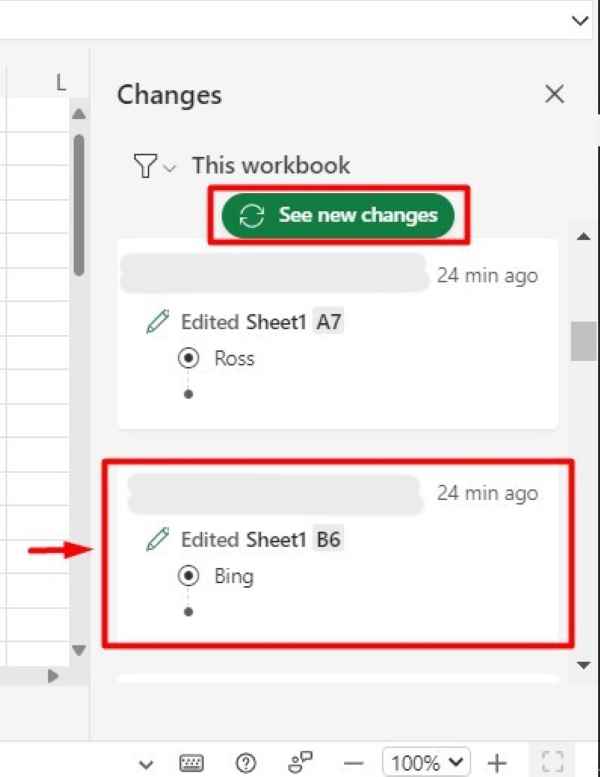
When you enable “Show Changes,” Excel displays any edits to your document in a panel on the right side of the screen. This panel shows details such as the specific cell that changed, the user who made the change, and the timestamp of the change.
4. Review and Highlight Details of Each Change
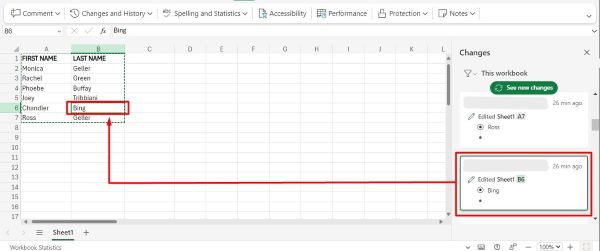
Proceed to edit your Excel data as needed. As you make changes, they will be automatically be recorded and shown in the “Show Changes” panel. This helps you keep track of all modifications in real-time and includes seeing the exact cell that was modified, the new value, and the previous value before the change was made.
We hope that you now have a better understanding of how to highlight changes in Excel. If you enjoyed this article, you might also like our article on ways to highlight highest value in Excel or our article on how to highlight empty cells in Excel.

