How to Delete Duplicates in Excel (Easiest Way in 2025)
In this article, we will show you how to delete duplicates in Excel. Simply follow the steps below.
Delete Both Duplicates in Excel
Duplicates can be deleted in Excel using two effective methods: the ‘Remove Duplicates’ feature and ‘Conditional Formatting.’ We will discuss how to use each method in the following sections.
Method 1: Using the Remove Duplicates Feature
Below, we outline the steps on how to delete duplicated in Excel using the Remove Duplicates feature.
1. Select the Columns Containing Names and Email Addresses
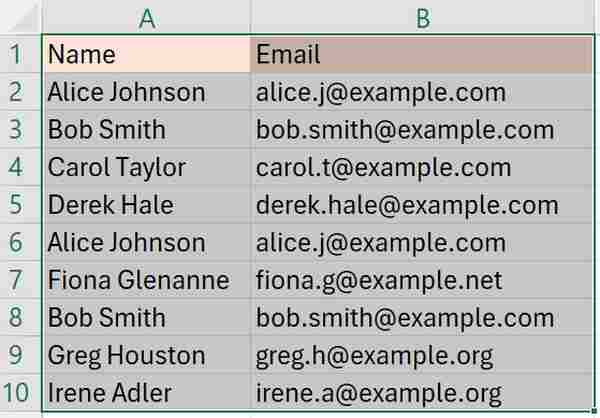
In our example, we have a list of names from cells A2 to A10, each paired with their email addresses in cells B2 to B10. You want to delete both duplicate names and email addresses.
Drag and select the entire column. This action highlights all the data in that column, preparing it for duplicate removal.
2. Access the ‘Remove Duplicates’ Tool in the Data Tab
Navigate to the ‘Data’ tab located in the upper toolbar of Excel. In the ‘Data Tools’ section, find and click the ‘Remove Duplicates’ button. This opens a new dialog box for duplicate management.

3. Specify the ‘Email’ and ‘Name’ Columns for Duplicate Identification
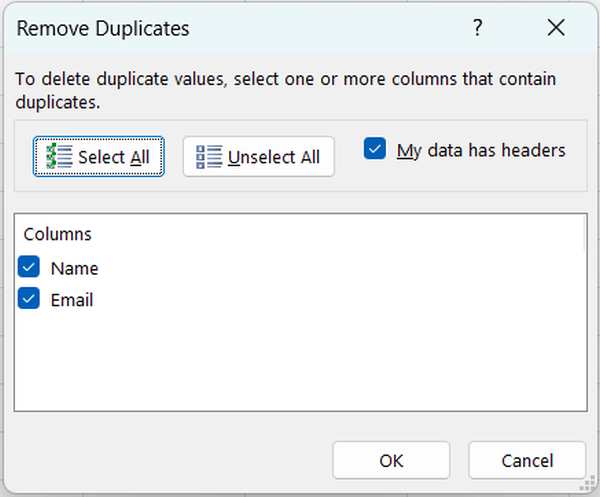
Within the Remove Duplicates dialog box, you’ll see a list of all columns in your dataset. Check all boxes to ensure Excel considers both names and email addresses when detecting duplicates. Click ‘OK’ to proceed.
4. Confirm and Review the Removal of Duplicates
After clicking ‘OK,’ Excel will process your data and remove rows containing duplicates. A summary message will appear, telling you how many duplicates were removed and how many unique values remain. Verify that the removal was performed correctly by scrolling through your data.

Method 2: Highlighting Duplicate Data Using Conditional Formatting
To delete duplicates in Excel using Conditional Formatting, we will work with a dataset containing names in Column A and email addresses in Column B. Follow the steps below.
1. Select the Name and Email Address Columns for Duplicate Detection
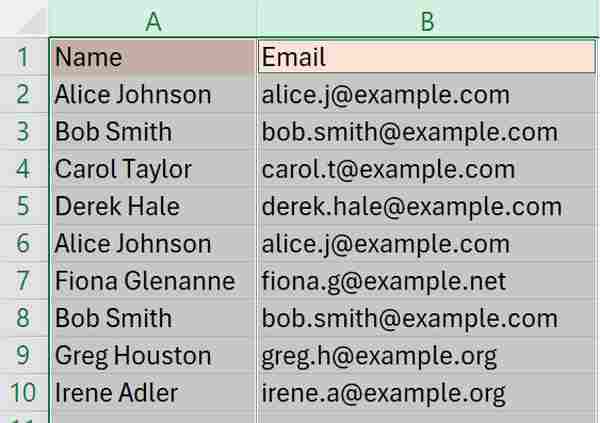
Highlight the ‘Name and ‘Email’ columns by clicking on their headers. This selection allows you to apply formatting rules to both headers.
2. Apply Conditional Formatting to Highlight Duplicates
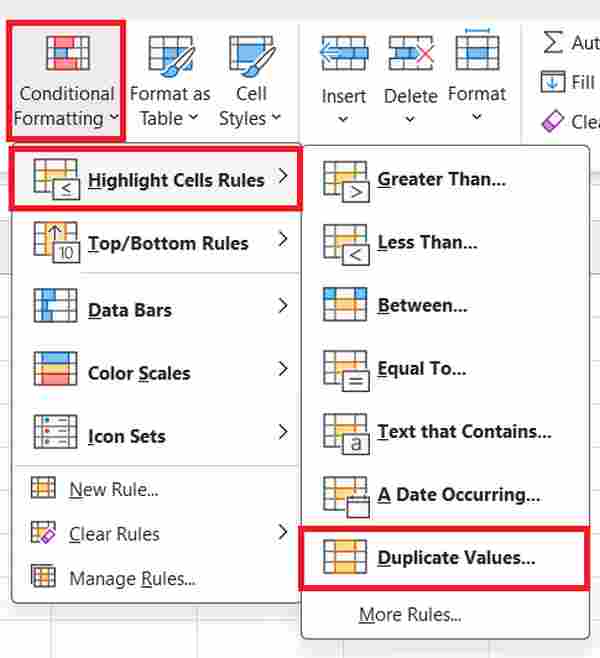
Under the ‘Home’ tab on the Excel ribbon, find and click on ‘Conditional Formatting.’ From the dropdown menu, select ‘Highlight Cells Rules’, and then choose ‘Duplicate Values’. This action will bring up a small dialog box.
3. Choose a Style to Highlight Duplicates
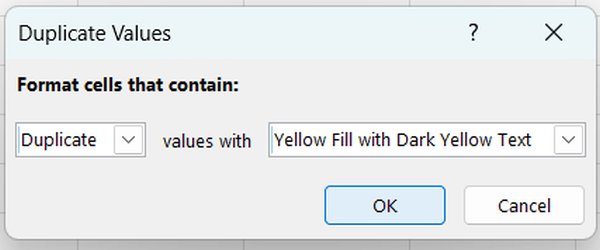
In the ‘Duplicate Values‘ dialog box, you can select how duplicates will be highlighted. Typical options include different colors for the text or cell background. Choose a style that makes the duplicates easily visible, and click ‘OK.’ In our case, let’s choose ‘Yellow Fill with Dark Yellow Text.’
4. Review the Highlighted Duplicates to Decide Further Actions
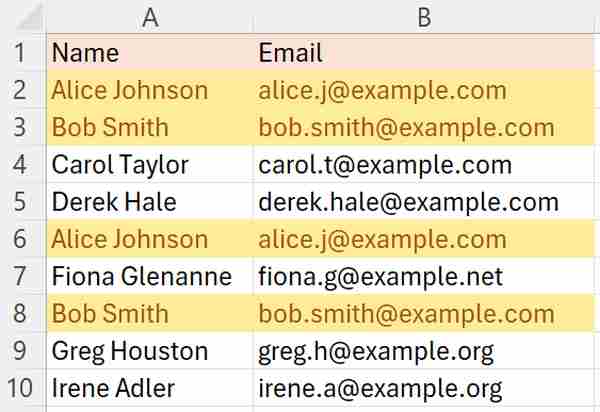
With the duplicates now highlighted, review your data to identify which entries are duplicates. This visual aid helps you decide which duplicates to delete, keep, or modify based on your needs.
5. Manually Delete or Adjust Highlighted Duplicate Entries
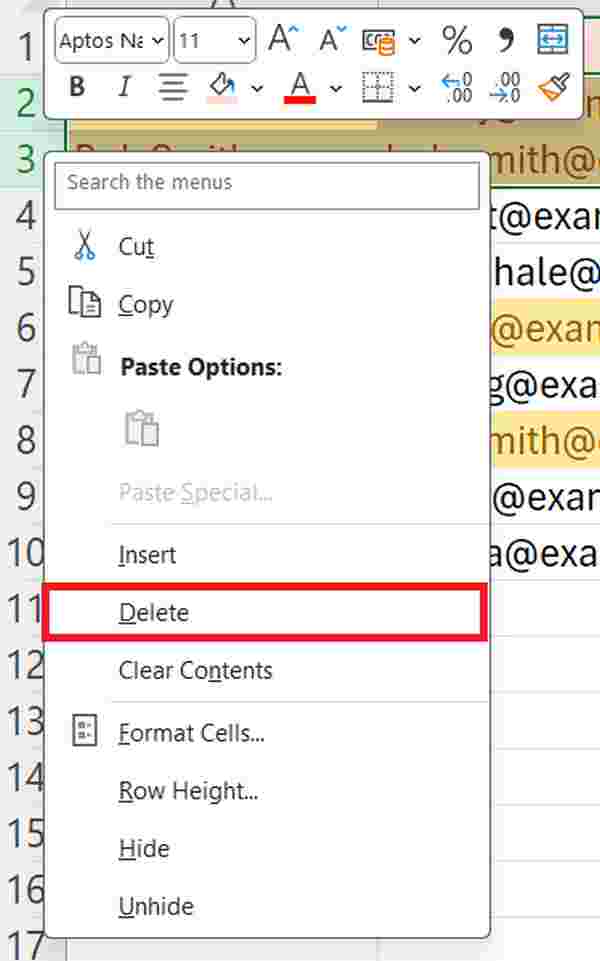
Based on your review, manually remove or adjust the duplicate entries. To delete an entry, select the row and press ‘Delete.’ To edit, simply type the new information directly into the cell.
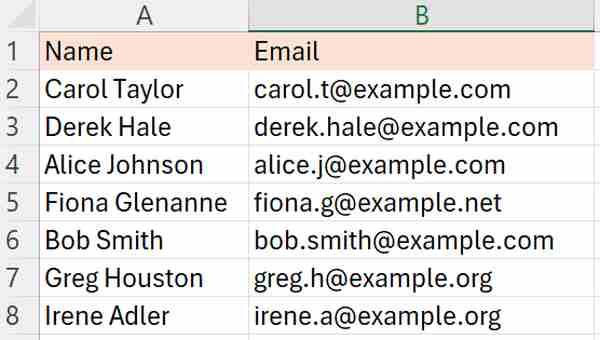
This will now display the names and emails with no duplicates.
We hope that you now have a better understanding of how to delete duplicates in Excel. If you enjoyed this article, you might also like our article on how to remove non-duplicates in Excel or our article on how to highlight blank cells in Excel.


