Remove Passwords from Excel Files (Easiest Way in 2025)
In this article, we will show you how to remove passwords from Excel files. Simply follow the steps below.
How to Remove Passwords from Excel Files
Follow the steps below on how to remove passwords from Excel files.
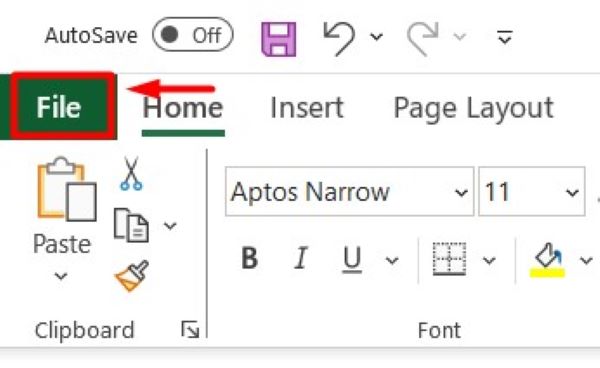
1. Open File Menu by Clicking on File Tab
Click on the “File” tab in the top left corner of the Excel window. This will open the file options menu, where you can access various settings and features of your workbook.
2. Select Info from File Menu and Click Protect Workbook
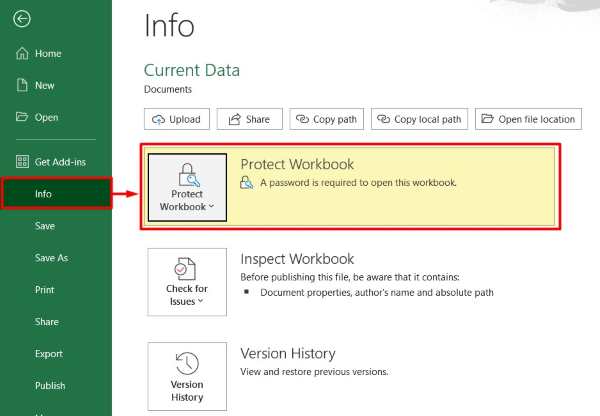
In the File menu, find and click on “Info” on the left sidebar. This will display information about your workbook. Under the “Info” section, click on “Protect Workbook” to access the options for securing your file.
3. Choose Encrypt with Password and Remove Password
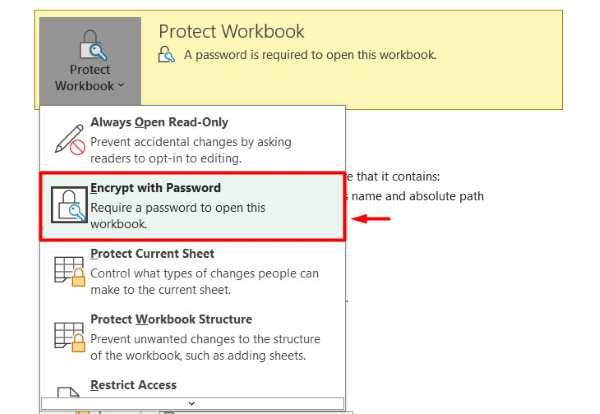
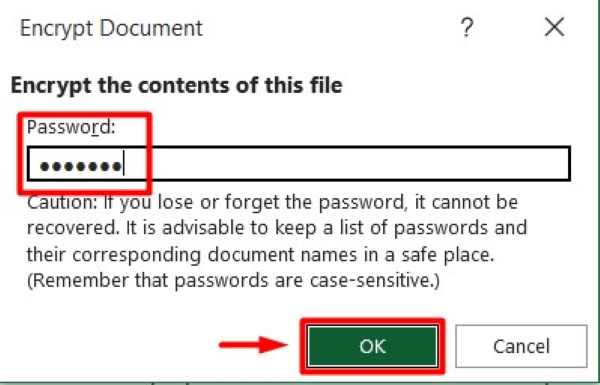
In the “Protect Workbook” dropdown, click on “Encrypt with Password.” A dialog box will appear prompting you to enter the password.
Delete the existing password from the field and click “OK.” This action removes the password protection from your workbook.
4. Save Workbook to Finalize Password Removal
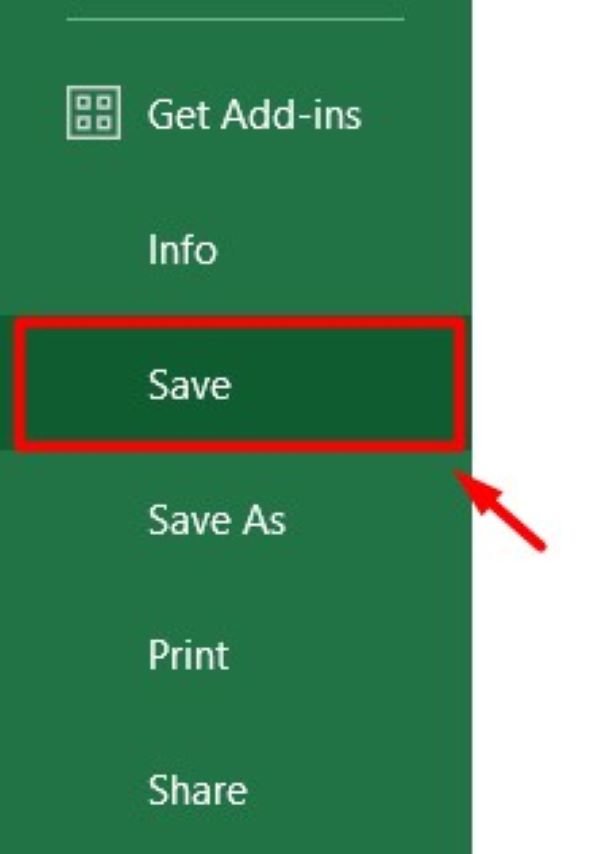
To finalize the changes, click “Save” or press “Ctrl+S.” This saves the workbook without the password. Your Excel file is now unprotected and can be opened without entering a password.
We hope you now have a better understanding of how to remove passwords from Excel files. If you enjoyed this article, you might also like our article on ways to convert multiple Excel files to CSV or our article on ways to password protect Excel files.

