Download Outlook Calendar to Excel (Easiest Way in 2025)
In this article, we will show you how to download Outlook Calendar to Excel. Simply follow the steps below.
How to Download Outlook Calendar to Excel
To download Outlook Calendar to Excel, we will focus on a set of events planned for June 2024. Follow the steps below:
1. Access the File Menu in the Calendar View
Ensure your Outlook desktop is set to the calendar view, showing the month of June 2024.
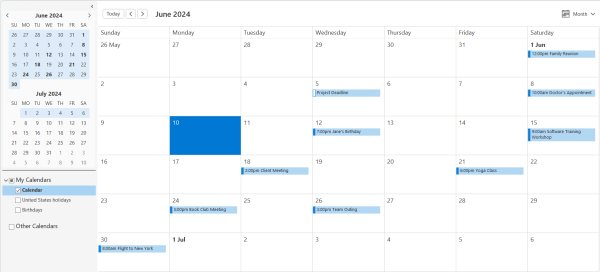
Locate the ‘File’ option in the upper left corner of your Outlook interface. This menu will provide you with various document management options, including the export feature.

2. Start the Export Process by Accessing the Import/Export Options
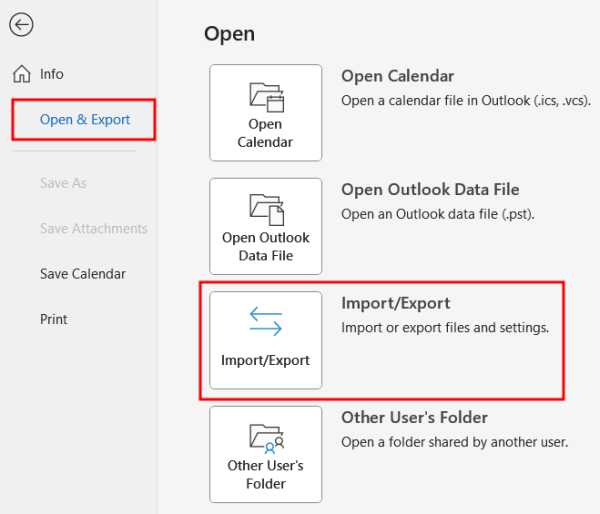
Within the ‘File’ menu, find and select ‘Open & Export.’ This opens a submenu. You should choose ‘Import/Export’. This action will initiate the Import and Export Wizard which is a tool that guides you through the process of exporting your data from Outlook
3. Launch the Import and Export Wizard to Select Export Options
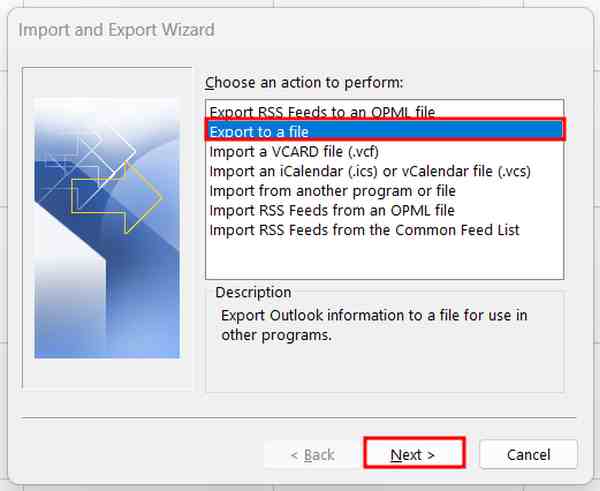
The Import and Export Wizard will open in a new window. Select ‘Export to a file’ from the list of options and then click ‘Next.’ This option is used for creating a copy of your Outlook data in a file format that can be used outside of Outlook.
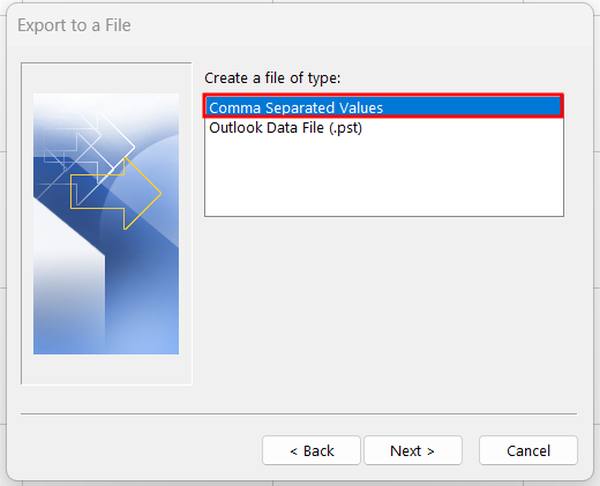
4. Choose ‘Comma Separated Values’ as Your Export File Type
On the next screen of the wizard, you will be prompted to select the type of file you want to create. Choose ‘Comma Separated Values (Windows)’ from the list. This format is ideal as it is supported by Excel and other spreadsheet programs, allowing for easy data manipulation and analysis.
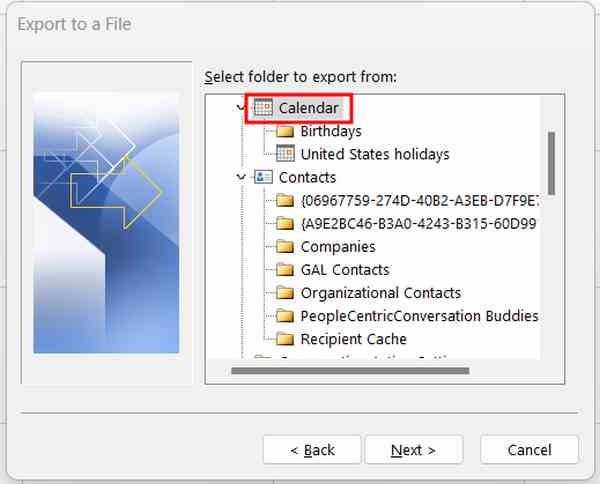
5. Choose ‘Calendar’ as the Source for Your Export
You will then see a list of folders from which you can export data. Scroll to and select ‘Calendar’. This ensures that the data for your appointments and events from June 2024 is what will be exported. Click ‘Next’ to proceed.
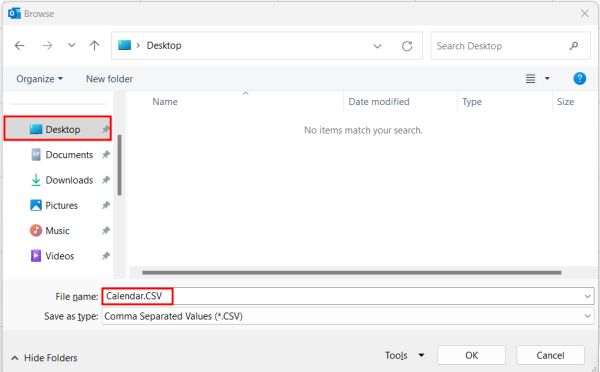
6. Save the CSV File to a Convenient Location on Your Computer
Choose where to save the exported CSV file on your computer. Then, you’ll be prompted to name your file. Ensure it saves with a .csv extension. In our case, let’s save it on the ‘Desktop’ and name it as ‘Calendar.’ Confirm your choices and save the file.
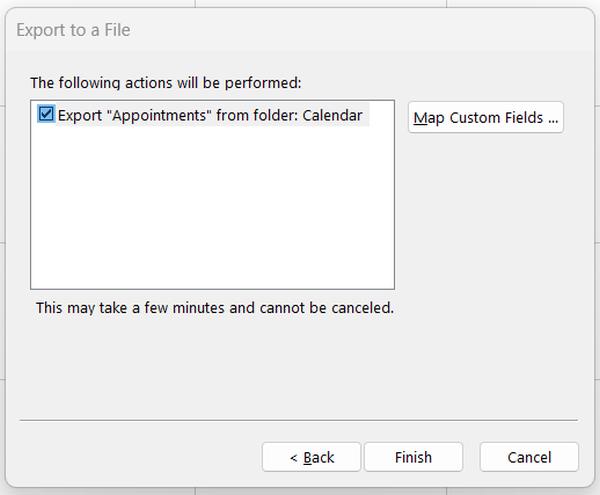
7. Confirm and Complete the Export of Your Calendar Data
Before finalizing the export, a summary screen will appear, allowing you to review your settings. Ensure the checkbox for ‘Export “Appointments” from folder: Calendar’ is selected, confirming that you are only exporting appointment data. Click ‘Finish’ to begin the export process.
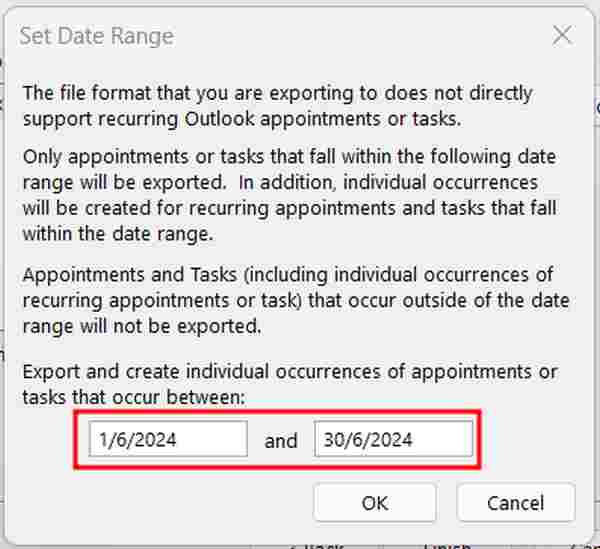
8. Define the Date Range for Your Calendar Export
An additional dialog box titled ‘Set Date Range’ will pop up. Here, specify the start and end date. In our case, let’s set June 1, 2024 as the start date and June 30, 2024 as the end date. This restricts the export to only include events within these dates. Confirm by clicking ‘OK,’ and the export will commence.
9. Import the CSV File Into Excel to View Your Calendar Data
After the export is complete, open Excel and prepare to import your calendar data. Navigate to the ‘Data’ tab on the Excel ribbon and select ‘From Text/CSV.’ Browse to the location where you saved your CSV file, select it, and open it.

Excel will then show a preview of the data. Click ‘Load’ to import the data into a new worksheet.
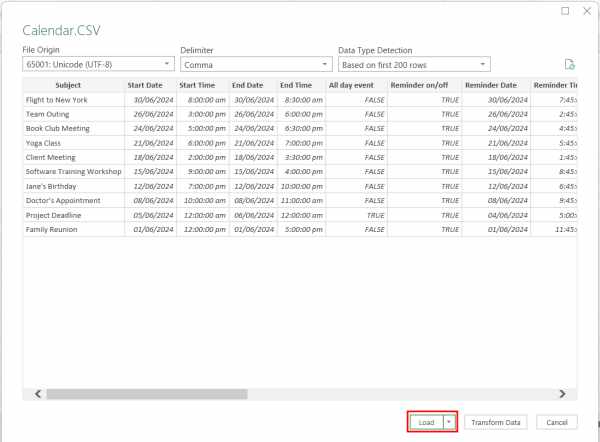
You have now downloaded your Outlook Calendar to Excel.

We hope that you now have a better understanding of how to download Outlook calendar to Excel. If you enjoyed this article, you might also like our article on how to download data from a website to Excel or our article on how to download google calendar to excel.

