Download Outlook Contacts to Excel (Easiest Way in 2025)
In this article, we will explore how to download contacts from Outlook to Excel. Simply follow the steps below.
How to Download Outlook Contacts to Excel
To download Outlook contacts to Excel, we have listed contact names along with their telephone numbers below. Please follow these steps:
1. Open the File Menu in Outlook
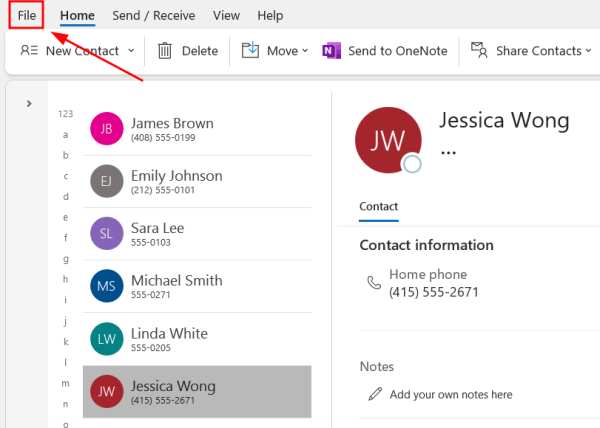
Click on the ‘File’ tab located in the upper-left corner of your Outlook window. This action will display a dropdown menu offering various options that help you manage your Outlook account and settings.
2. Navigate to ‘Open & Export’
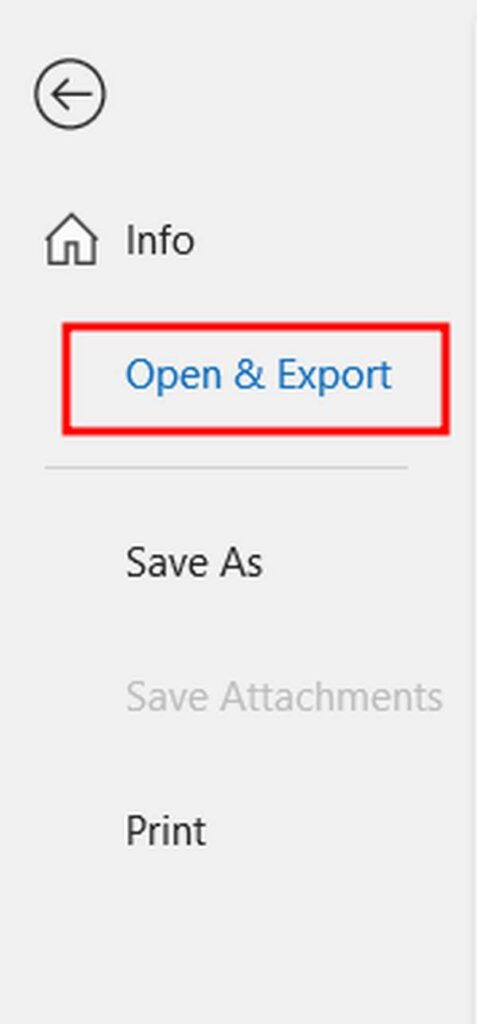
Within the File menu, locate and click on the ‘Open & Export’ option. This section of the menu provides tools related to accessing and exporting your Outlook data.
3. Select the ‘Import/Export’ Option
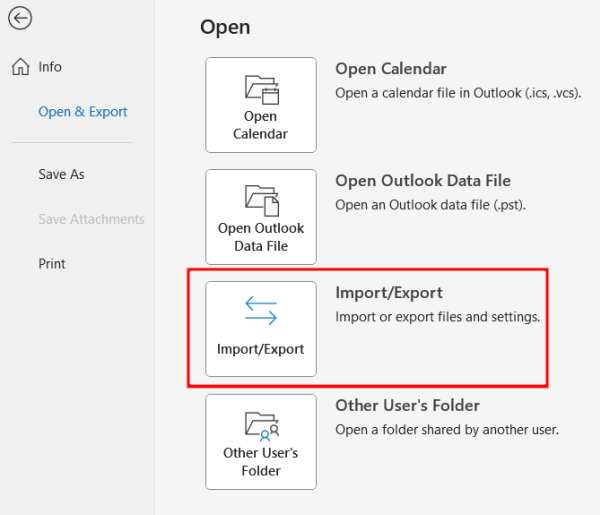
In the ‘Open & Export’ submenu, click on the Import/Export button. This opens a wizard that guides you through the process of exporting your data, allowing you to choose exactly what information, such as contacts, you want to export.
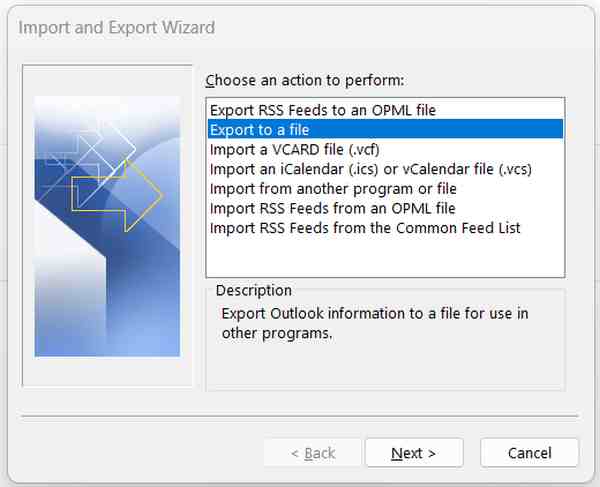
4. Start the Export Process
When the Import/Export wizard opens, select the ‘Export to a file’ option and then click ‘Next.’ This choice starts the process of exporting your contacts to a file format that can be easily transferred to other applications like Excel.
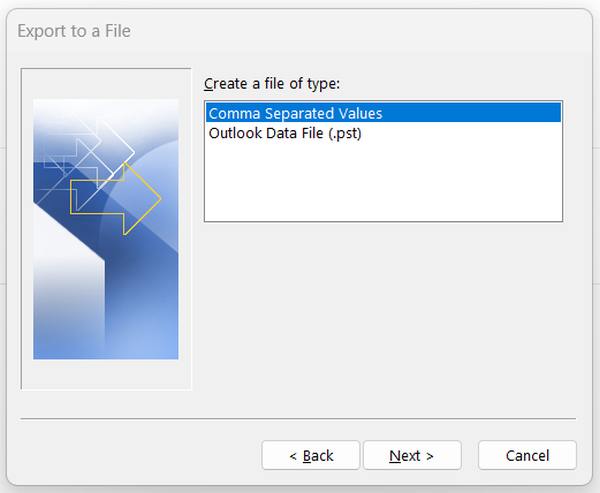
5. Choose ‘Comma Separated Values’ as the File Format
In the next step of the wizard, choose ‘Comma Separated Values (Windows)’ as the type of file to create. This format is essential for ensuring compatibility with Excel, which will allow you to manipulate and manage your contacts later.
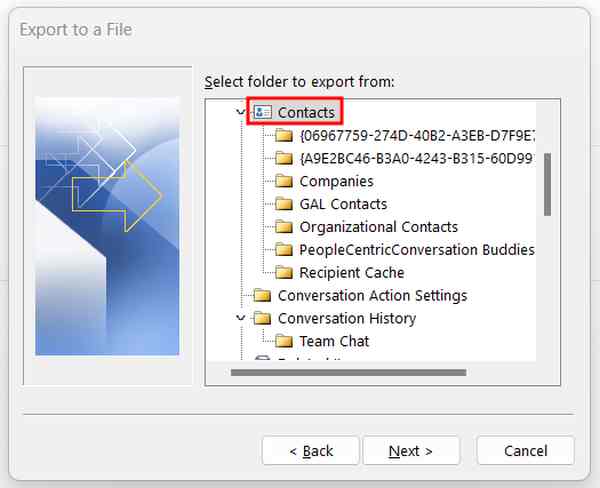
6. Select the ‘Contacts’ Folder for Export
Now, choose the ‘Contacts’ folder from the list of available Outlook folders. Make sure you select the correct folder to export only the contact information you need. After selecting, click ‘Next’ to proceed with exporting these details.
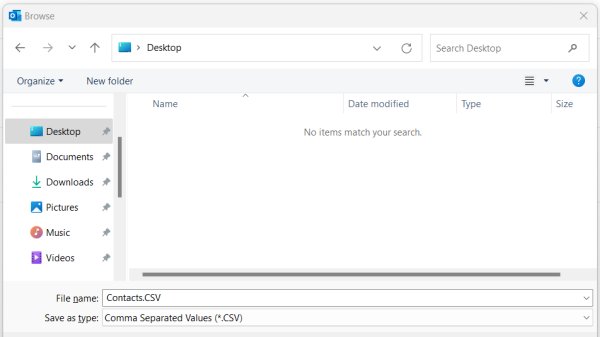
7. Save the Exported File to Your Computer
Decide where you want to save the exported file on your computer. Use the browsing interface to select a directory, and be sure to name the file with a clear, descriptive title, ending with ‘.csv.’
In our case, let’s save our file on the ‘Desktop’ and choose ‘Contacts’ as the name of our file. Click ‘Finish’ to save the file and complete the export process.
8. Import the CSV File into Excel Using the Data Tab
In Excel, navigate to the ‘Data’ tab on the ribbon. Select ‘From Text/CSV’ to open the file explorer. Locate and select the .csv file you saved earlier.

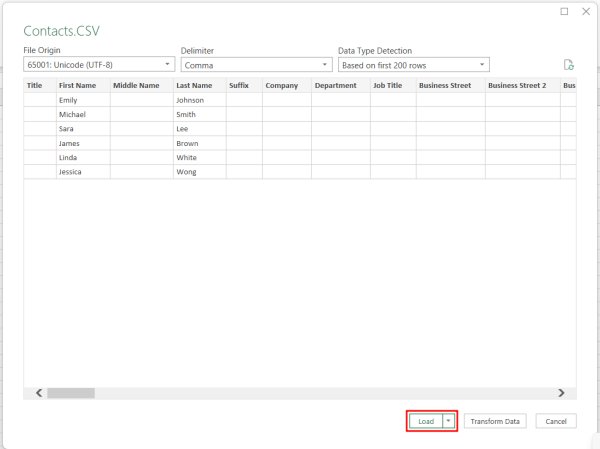
Excel will then show a preview of the data. Click ‘Load’ to import the data into a new worksheet.
9. Verify Contact Information
Review the data in Excel to make sure all contacts are correctly displayed and formatted. Note that the exported file from Outlook may contain several headers with no information, as indicated in the table here. This is your opportunity to adjust or delete unnecessary columns.

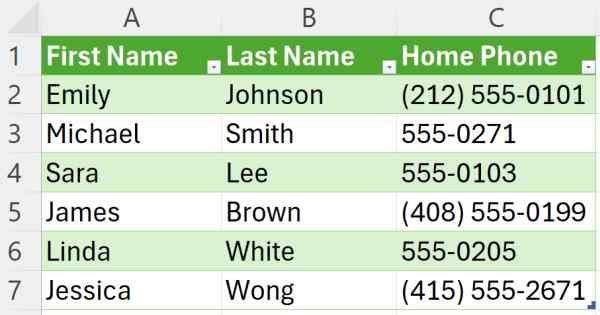
In this example, we want our data in Excel to display only the first name, last name, and Home Phone Number.
We hope that you now have a better understanding of how to download Outlook contacts to Excel. If you enjoyed this article, you might also like our article on how to download Google Calendar to Excel or our article on how to download Excel on Macbook.

