How to Export Excel to PDF (Easiest Way in 2025)
In this article, we will show you how to export Excel to PDF. Simply follow the steps below.
How to Save Excel to PDF
Below are some of the most common methods to save an Excel file as a PDF:
Using the Export Feature
Follow the steps below to easily export Excel to PDF using the export feature.
1. Review Your Spreadsheet
Ensure your Excel file is formatted correctly. Check for any errors or missing information.
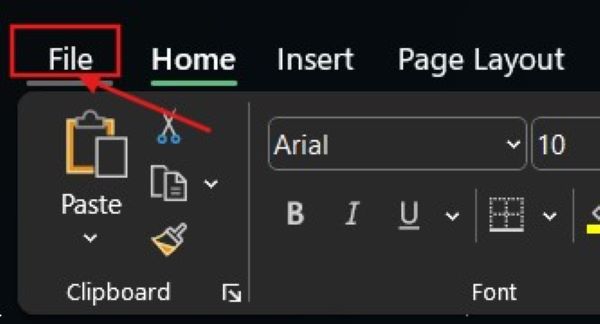
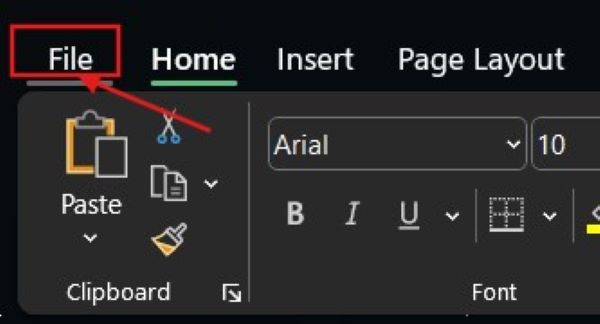
2. Navigate to the “File” Menu
Click on the “File” tab in the top left corner of the Excel window.
3. Select “Export” Option
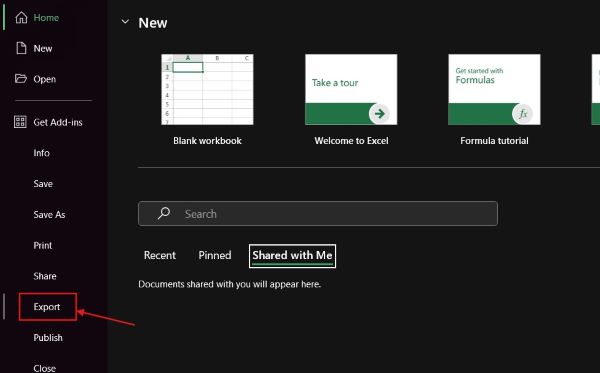
In the File menu, click on “Export.”
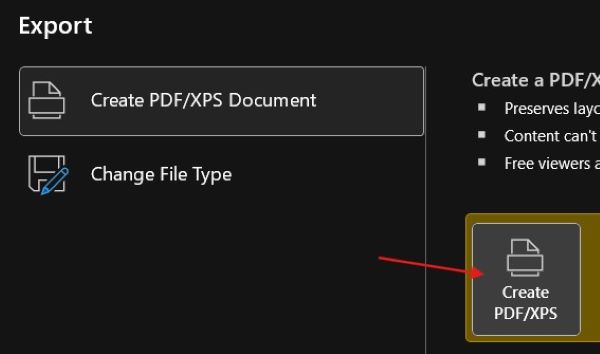
4. Choose “Create PDF/XPS Document”
Under Export, select “Create PDF/XPS Document.”
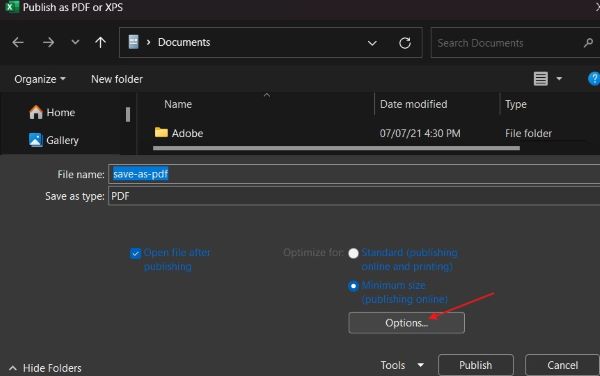
5. Set PDF Options
Review the settings for your PDF file. Adjust settings if necessary, like page range or quality.
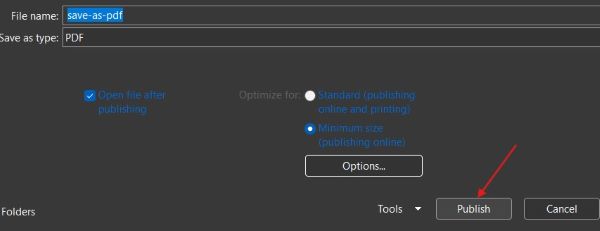
6. Click “Publish”
Click on the “Publish” button to start the conversion process.
7. Review Your PDF
Open the saved PDF to ensure everything looks correct. Make any necessary adjustments in Excel if needed.
Using the “Save As” Feature
To export Excel as PDF using the save as feature, simply follow the steps below.
1. Navigate to the “File” Menu
Click on the “File” tab in the top left corner of the Excel window.
2. Select “Save As” Option
In the File menu, click on “Save As.”
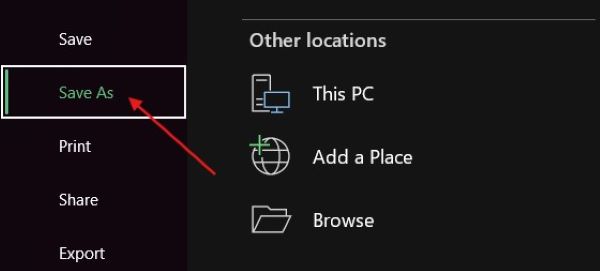
3. Choose “Browse” for Locations
In the Save As dialog box, choose the location where you want to save the PDF.

4. Choose PDF Format
In the “Save as type” dropdown menu, select “PDF (*.pdf).”
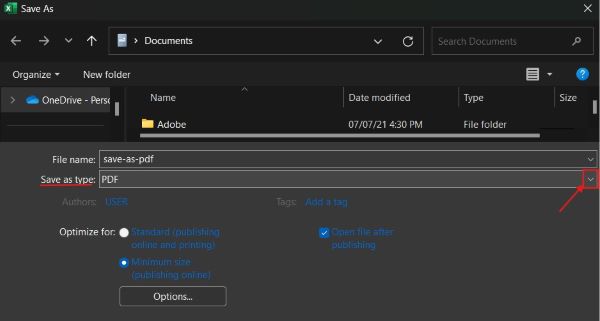
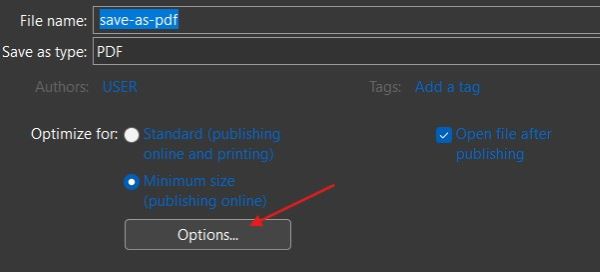
5. Click “Options” to Set Format
Review the settings for your PDF file. Adjust settings if necessary, like page range or quality.
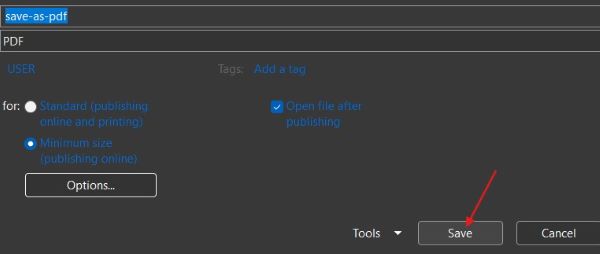
6. Click “Save”
Click on the “Save” button to convert your Excel file to PDF format.
7. Review Your PDF
Open the saved PDF to ensure everything looks correct. Make any necessary adjustments in Excel if needed.
Using the “Print” Feature
In this section, you’ll learn to use the print feature to save Excel as PDF.
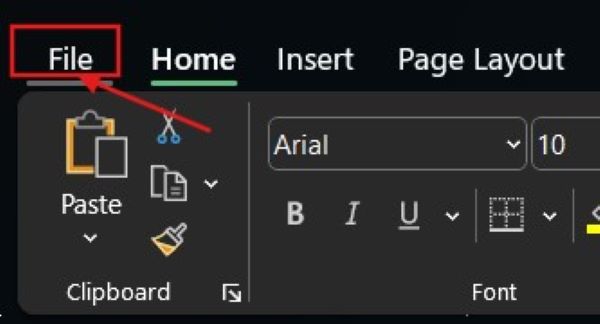
1. Navigate to the “File” Menu
Click on the “File” tab in the top left corner of the Excel window.
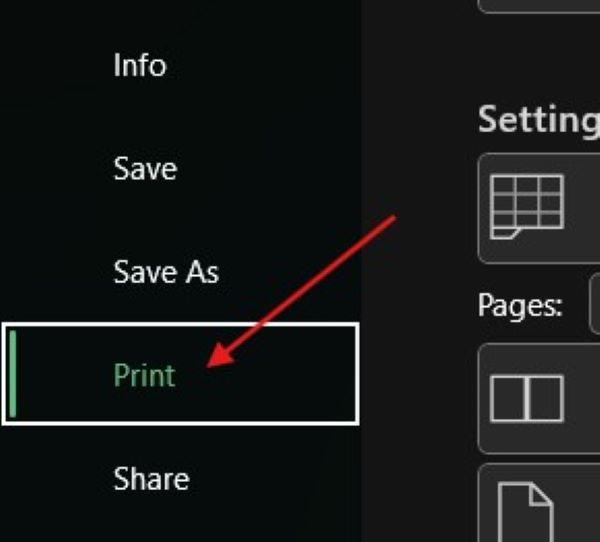
2. Select “Print” Option
In the File menu, click on “Print.”
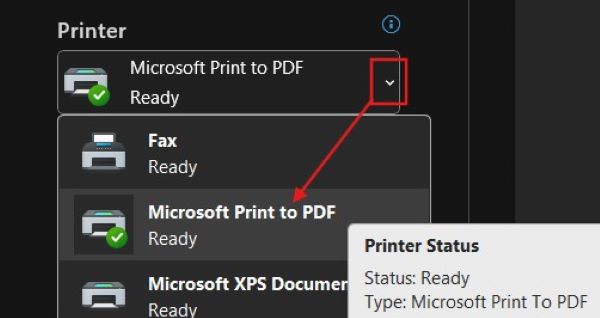
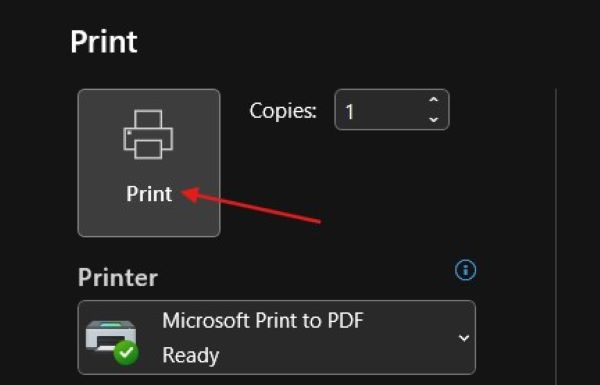
3. Choose Printer
In the Printer dropdown menu, select “Microsoft Print to PDF.”
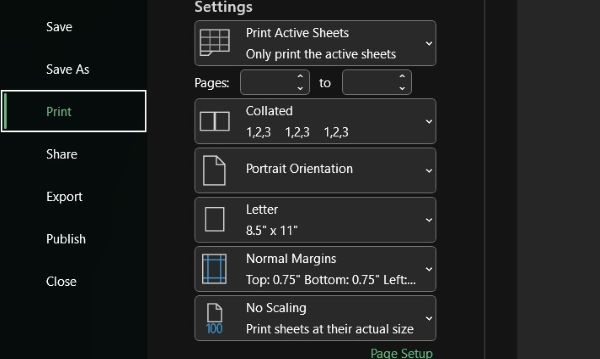
4. Adjust Settings
Review the settings for your PDF file. Adjust settings if necessary, like page orientation, size, and margins.
5. Click “Print”
Click on the “Print” button to start the conversion process.
6. Review Your PDF
Open the saved PDF to ensure everything looks correct. Make any necessary adjustments in Excel if needed.
We hope you now have a better understanding of how to export Excel to PDF!
If you enjoyed this article, you might also like our article on how to import data from PDF to Excel or our article on how to save Excel as PDF on one page.

